If you've started with a brief and vague name for your recipe but you now want to give it a more specific or distinct name, follow this step-by-step tutorial to make the desired change seamlessly.
Rename Recipe on Recipe Tab
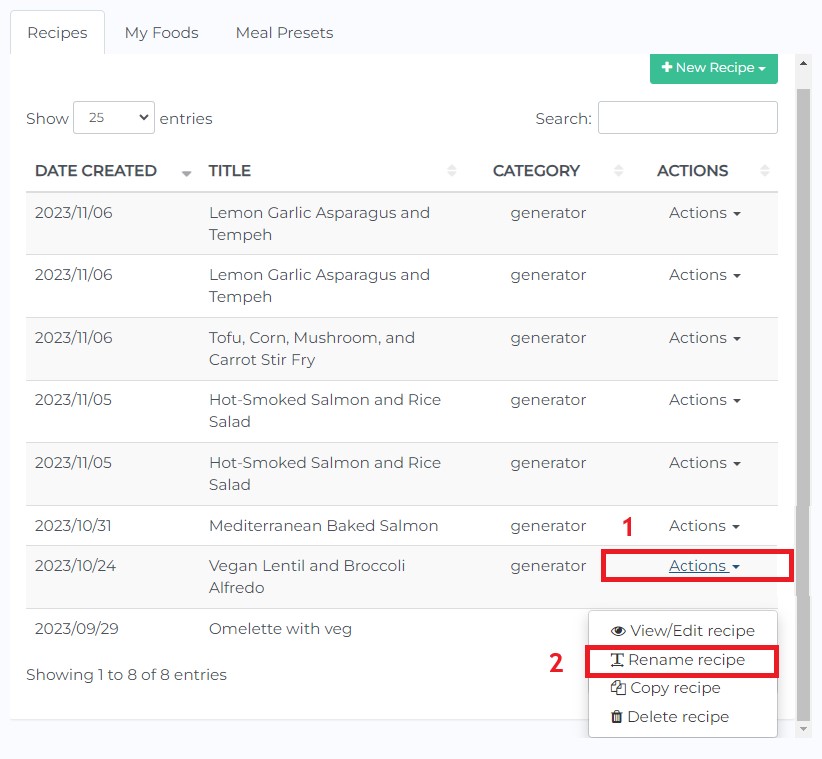
Step 1: On your Recipes tab, choose a recipe you want to rename and click the Actions drop down. Select the Rename recipe option.
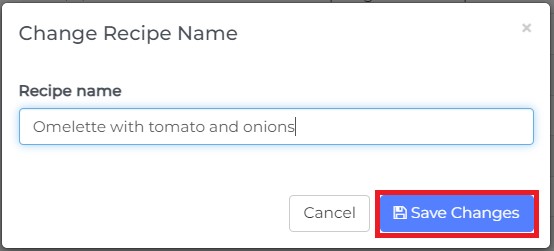
Step 2: Rename the recipe as desired then Save Changes.

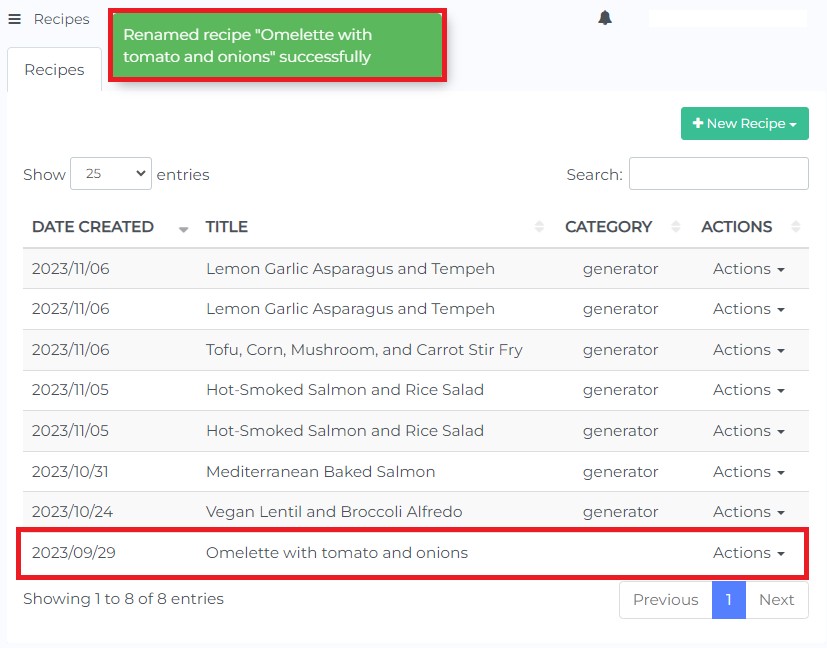
It would look like this after:
Alternatively, you can also click the recipe and edit Recipe Name. This would give you the same result as shown above.

Rename Recipe while Editing a Meal Plan
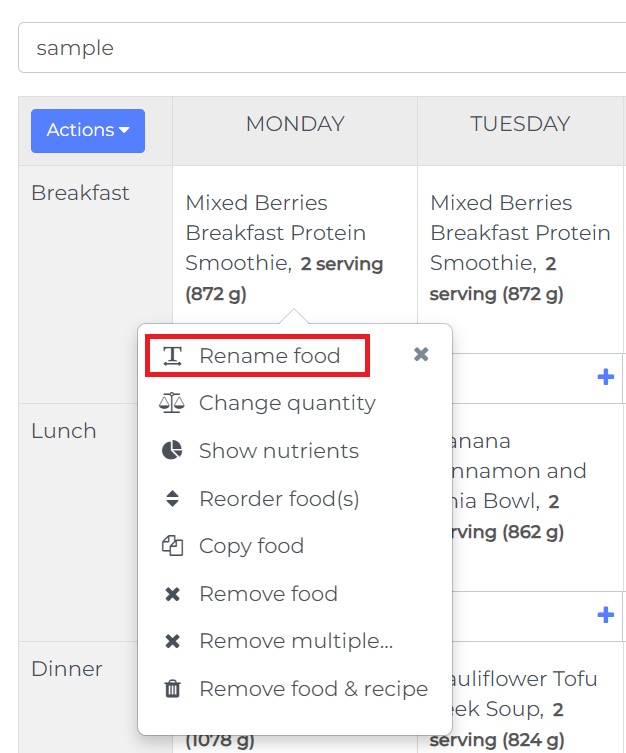
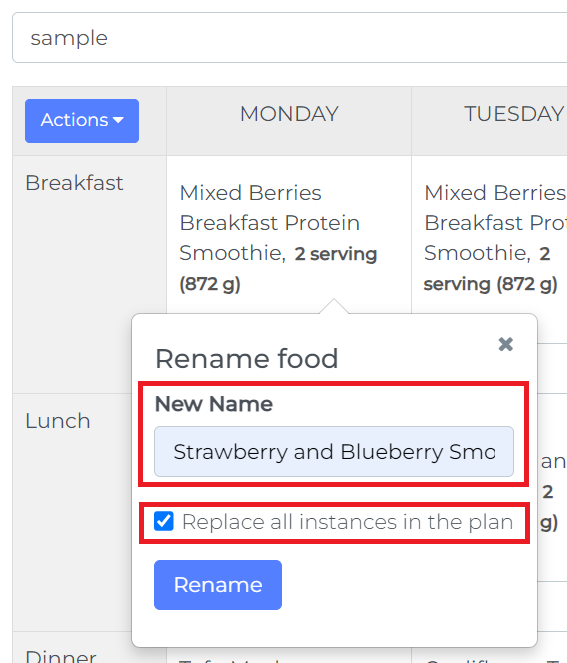
Step 1: Select a recipe you want to rename then click on Rename food.
Step 2: Rename the recipe as desired. If you want to rename your chosen recipe for the entire plan, you can check box Replace all intances in the plan.
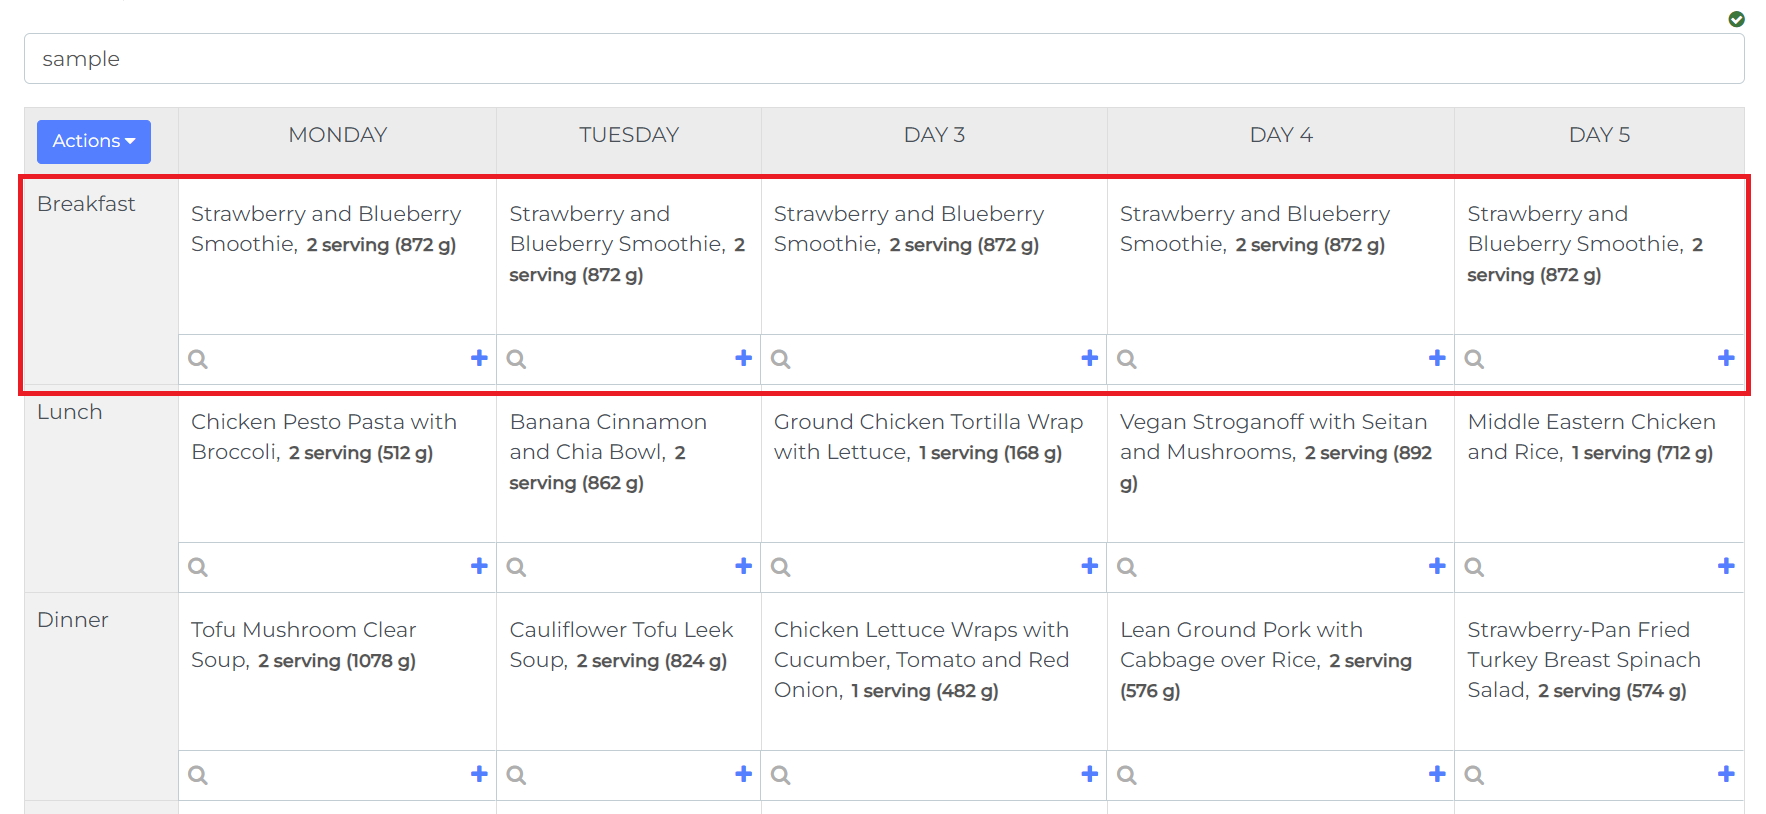
If you check the Replace all intances in the plan, this is how it would look like:
To learn how to edit meal plans, you can click this link for the tutorial.