When you are adding food products to meal plans or recipes, you may not be able to find certain food products you need. This will be especially true of:
- Local products
- Ethnic foods
- Supplements
- Non-US food brands
- Uncommon food items
NutriAdmin uses a food database provided by the US Department of Agriculture that contains tens of thousands of food items. Even though these are a lot of products, you may not be able to find items that fall into the categories listed above. To alleviate this problem, NutriAdmin allows you to create your own foods.
How to create your own foods
Step 1: Click on Recipes & Foods on the left menu.
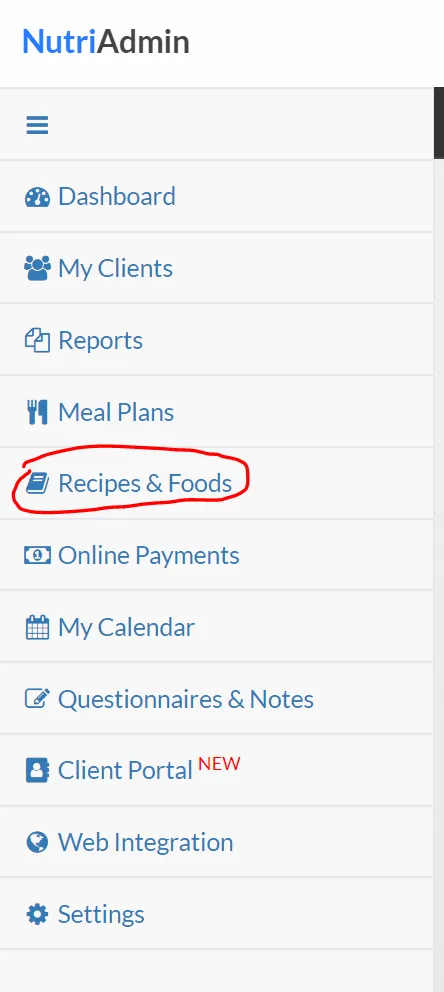
Then select the My Foods tab.
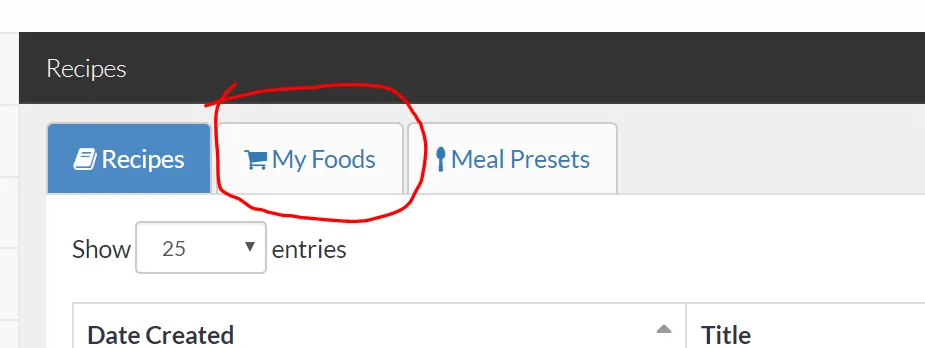
Step 2: You will see a list of your existing food products. You can view, edit, and delete any of them at any point. To create a new food item, click on New Food on the top-right corner of the screen.

Step 3: Enter the food name and select a group from the dropdown. Press confirm when ready.
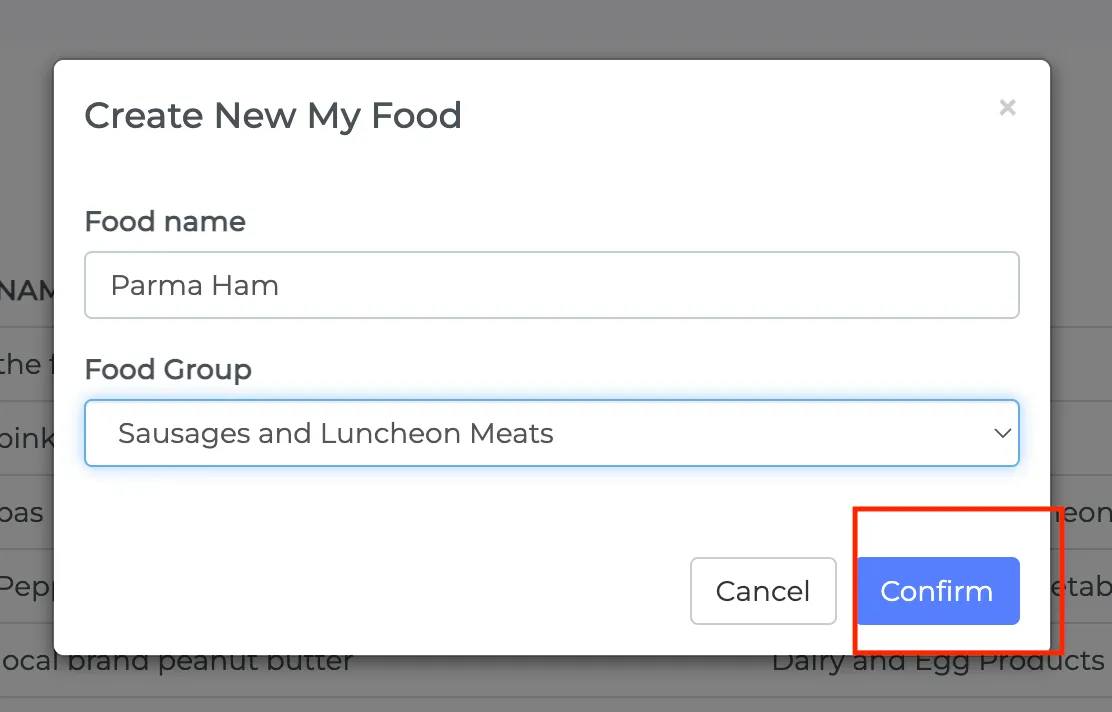
Step 4: Your food has been created. Now you can click on it in the table containing all foods to edit it.

Step 5: There are 3 tabs to edit the food. The first tab is the Overview. Here you can change the name/group of the food. Changes are auto-saved.
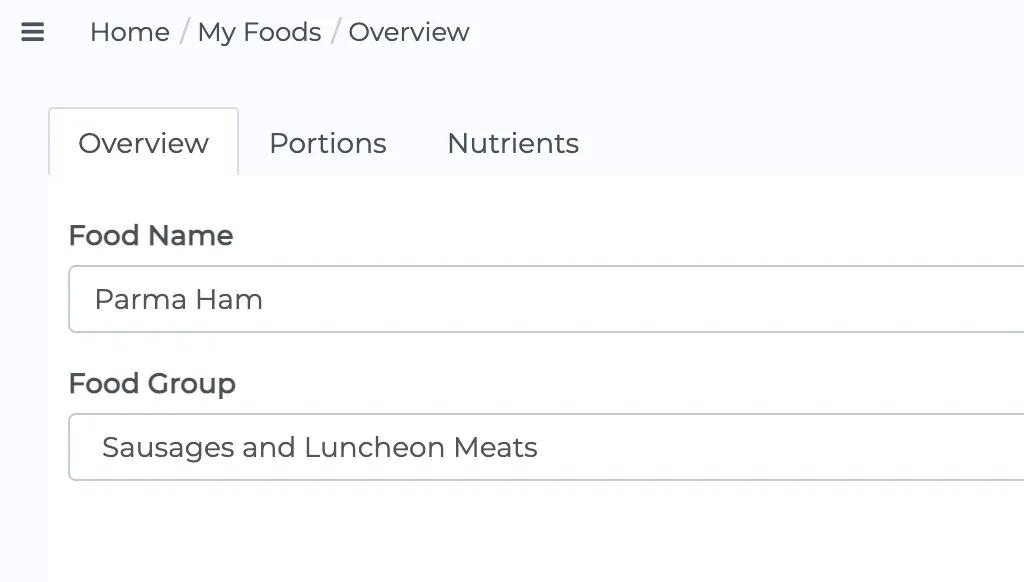
Step 6: If you click on the Portions tab, you will be able to edit portions.
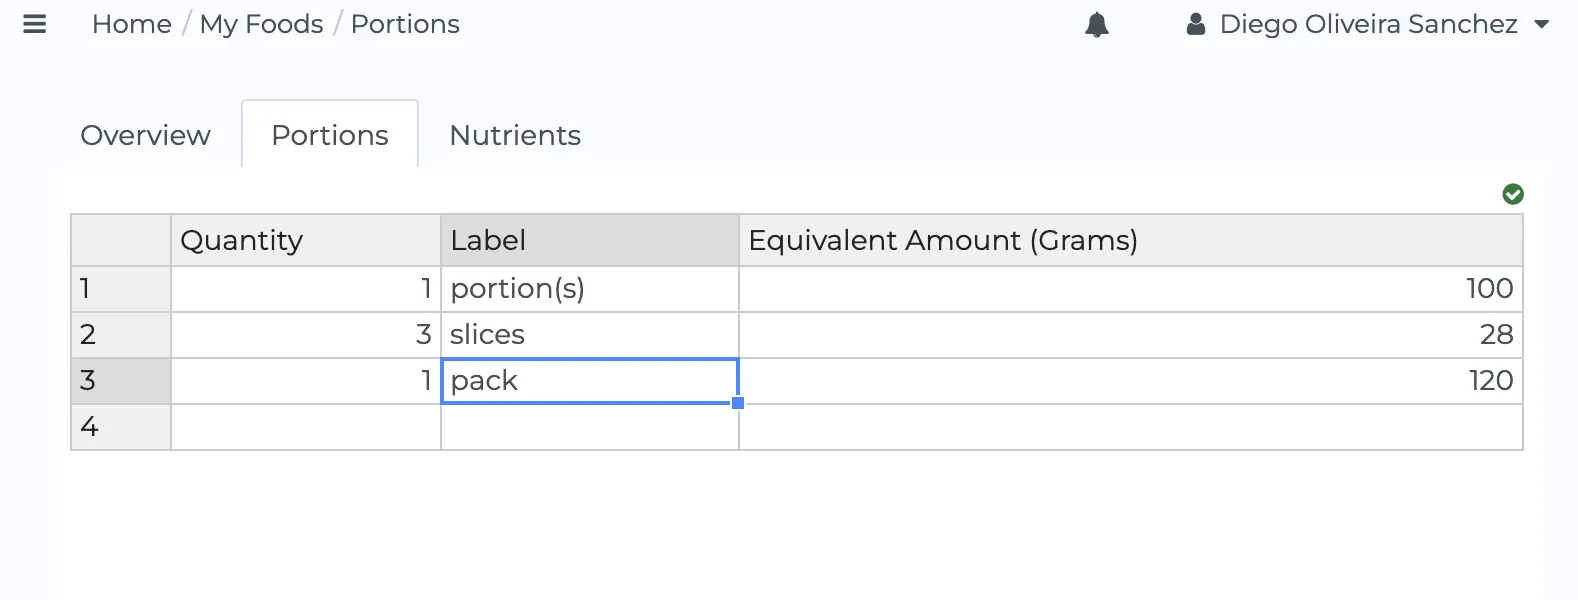
To use the spreadsheet, you have to fill in data for the:
- Quantity: e.g. 1, 2, 3, 4. How many of these units are typically consumed
- Label: the name of the portion, e.g. cup, ounce, slice, pinch, tbsp, tsp, etc
- Equivalent Amount: the amount in grams or in ounces (depending on your settings) for this portion.
So, for instance, you can add quantity: 1, label: "pack", and equivalent amount 120 g. This means that a portion size for Parma Ham in this example is a pack that weighs 120 grams in the shop.
Another alternative would be to list quantity: 3, label "slices", equivalent amount: 81 grams. This means that each slice weighs 28 grams and that there are 3 in this portion. Since there are three slices, the total weight is 28×3 = 81 grams in this example. You just have to enter the total number in the equivalent amount column.
Changes are auto-saved as you fill in data in the spreadsheet.
Step 7: Populate the fields for nutrients in your new food product. You can click the Nutrients tab to do this.
You can choose how to enter nutrients. You can choose from the dropdown to enter nutrients per:
- 100 grams
- 1 oz
- portion size (depends on the portions you created on the portions tab)

The values for energy, protein, fat, and carbohydrate are mandatory. It should be noted that nutrient values are measured per hundred grams or per portion size depending on what you choose in the dropdown. The default is by portion size.
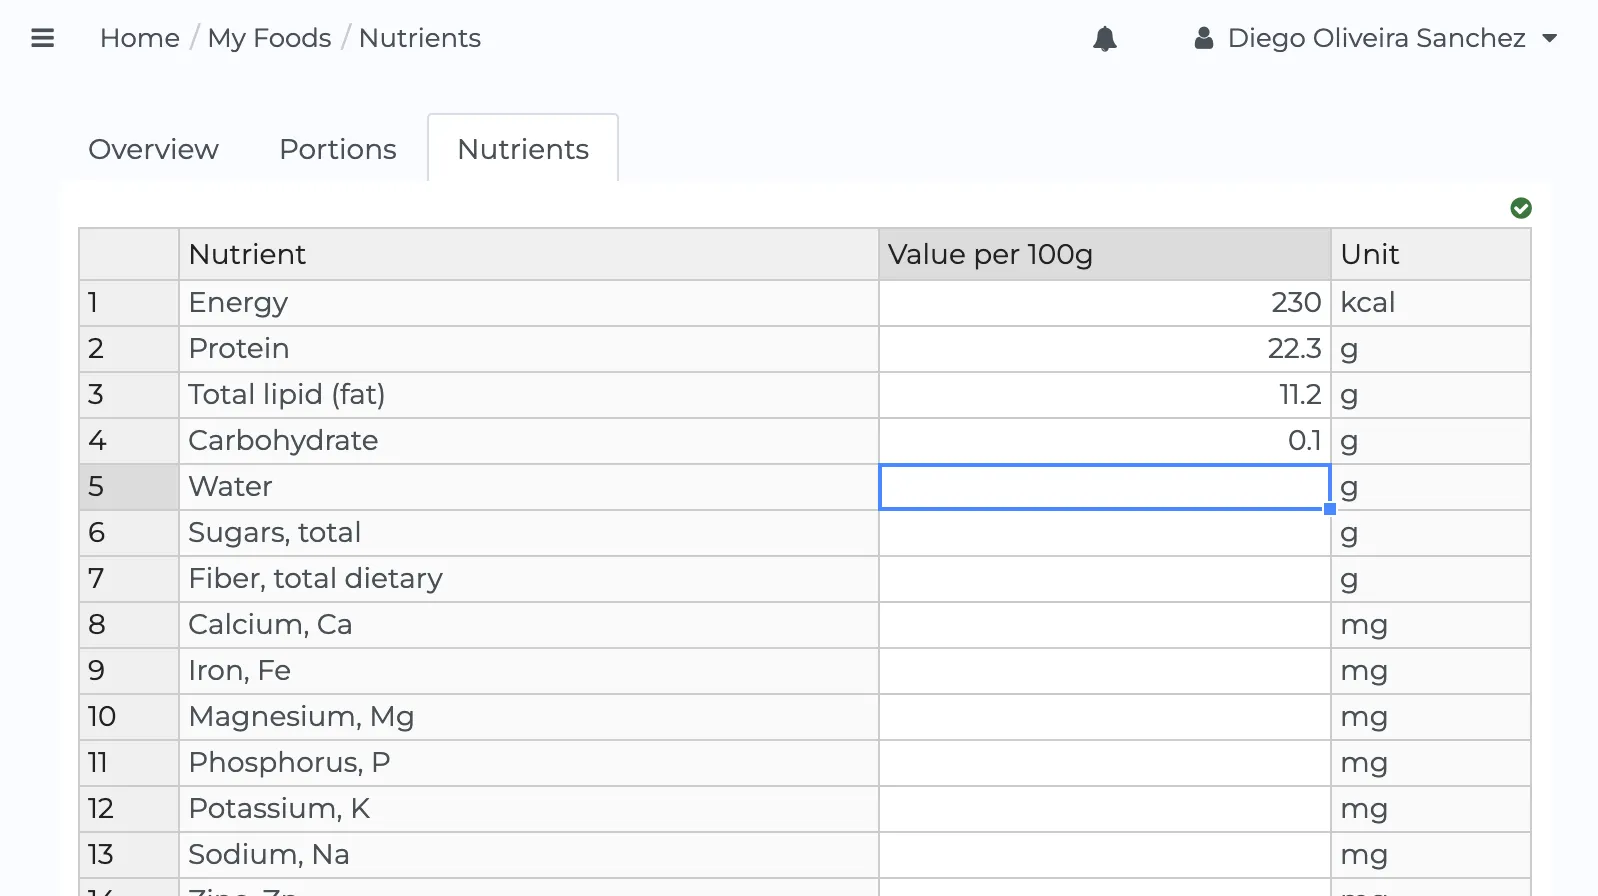
Micronutrient values can be left blank, and the system will populate them as 0. It is recommended though that you include any important micronutrient information for the food products you are creating, as the data you enter here will be used when creating a meal plan or recipe later.
You can change which nutrients are available when creating a food. For instructions on how to do so, check this other article.
Changes are saved automatically as you type in the spreadsheet.
How to use your custom foods
Next time you are creating a meal plan or a recipe, you will have the change to select Use My Custom Food as an option when adding a new food.
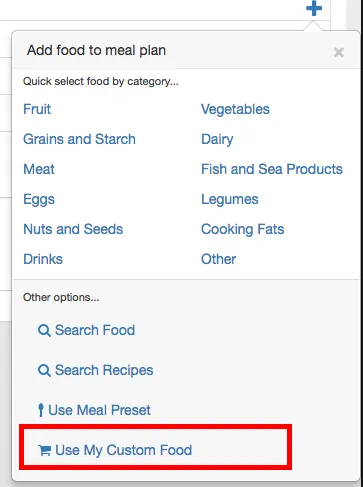
Clicking this button will open a panel where you can select your existing food products. The nutritional content you entered when creating your food will be used in calculations, so you should ensure information is accurate.
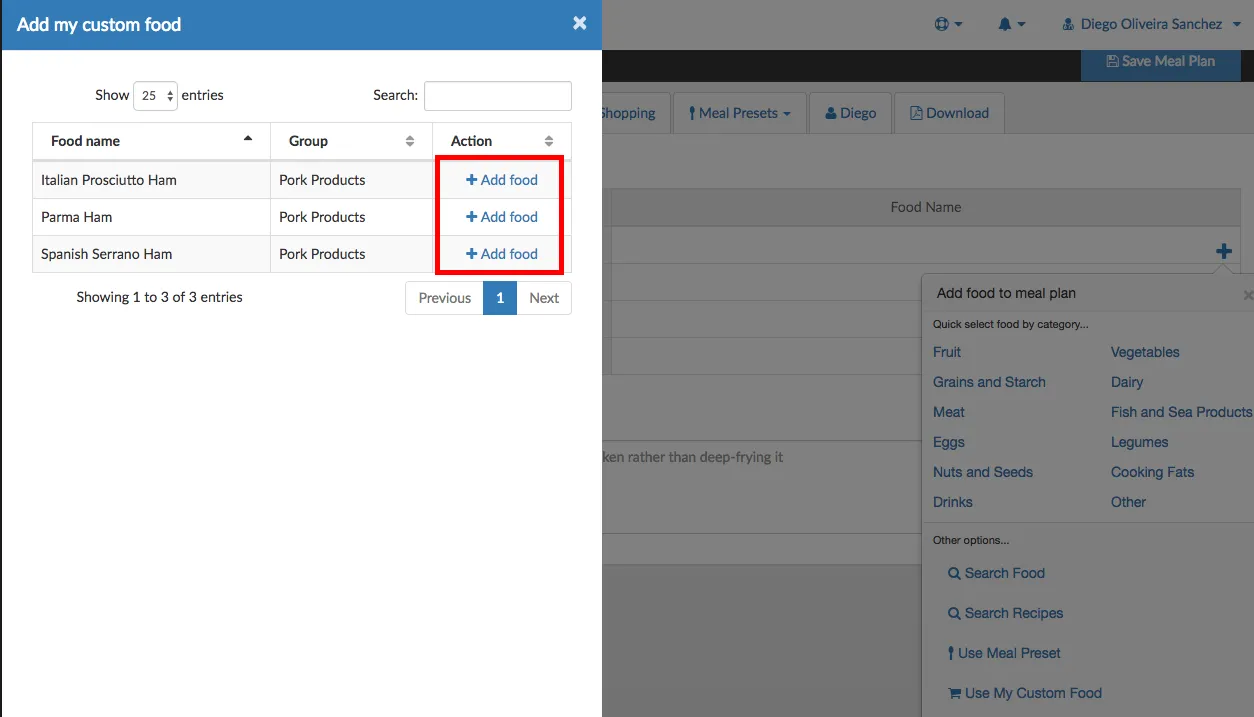
You can search and sort on the table of available foods if your own collection is large.