When creating a report in NutriAdmin, you will be able to add/edit tables in many different ways. This document shows a few examples and some of the capabilities when writing reports or templates.
First of all, you will need to start a new report. If you are new to NutriAdmin's reports, you can watch a short video on how they work in this page.
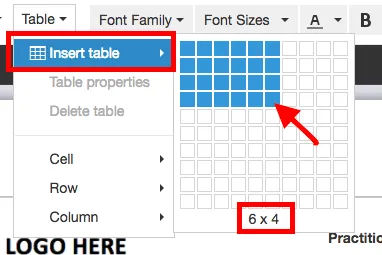
When writing a report, you will have access to a tool-bar on the top of your screen with different options. To insert a table in your document, you have to click on Table

When hovering with your mouse over the insert table item on the menu, you will see a grid of small squares. These squares represent the different cells of your table. By simply hovering over the squares, you can tell NutriAdmin how many rows and columns you want for your new table.
In the example below, clicking on the position indicated by the red arrow will create a new table with 6 columns and 4 rows. Notice how the blue squares represent a small table with 6 × 4 cells.
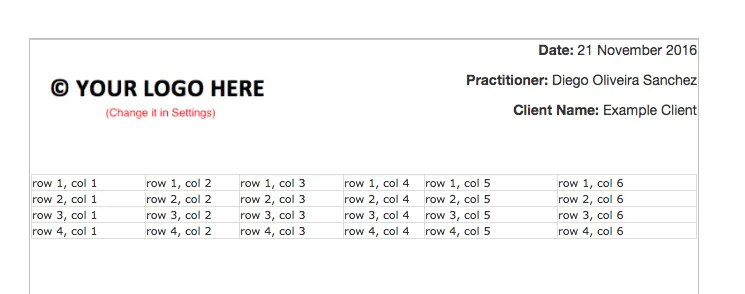
Below is the resulting table. The table will be empty by default, but we have written the corresponding row and column number of each cell so that is clear that the table is 6 × 4.
Once you have inserted a table, you can edit it in many ways. For example, in order to write content inside any given cell, all you have to do is to click it and type.
You can also select cells with your mouse and perform operations on them. When you drag your mouse over multiple cells, selected cells will be highlighted in blue. Below is an example were the first row of the table is selected

Once you select a row, column, cell, or combination of cells, you can click on the Table menu on the top tool-bar. The menu will open providing you with many options to format your table and perform operations.
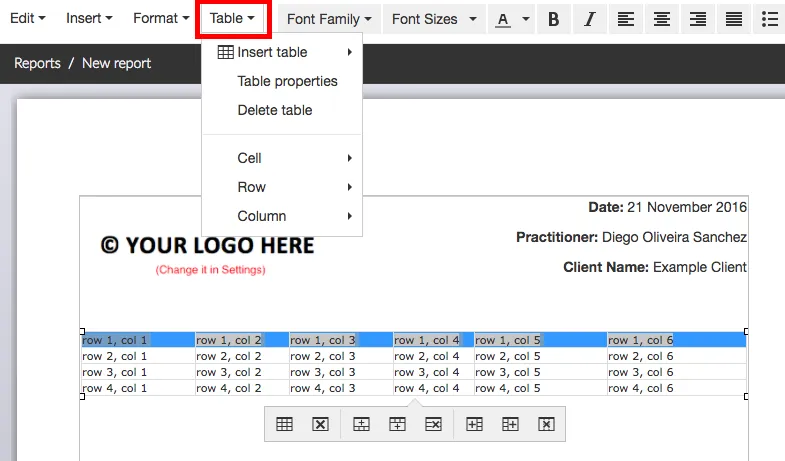
You can do several things when you select cells. Examples include: * Deleting a row * Adding a new row (before or after the cells selected) * Deleting a column * Adding a new column (before or after the cells selected) * Align table content * Add/remove formatting * Copy rows/columns * etc
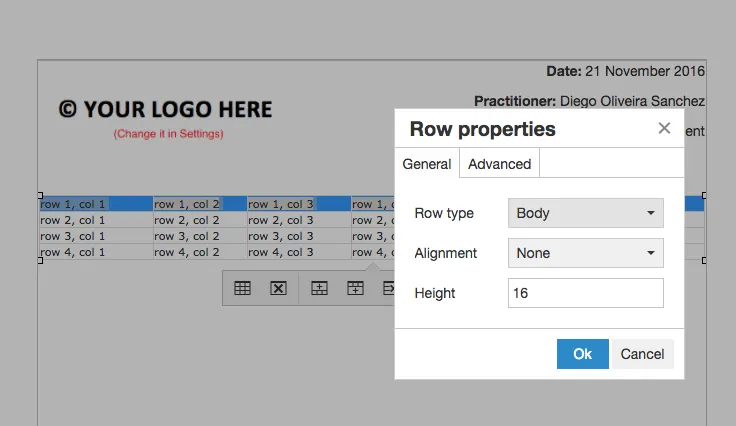
In the example below the item ** Row properties** is clicked.
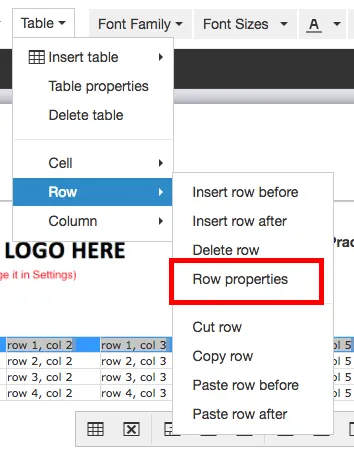
In the *Row properties* menu you can change settings such as: * Transform the row type to be either a header, body, or footer component of the table * Change the borders of the cells in the row * Change the size of the row * Apply the alignment (left, center, right) you want * etc
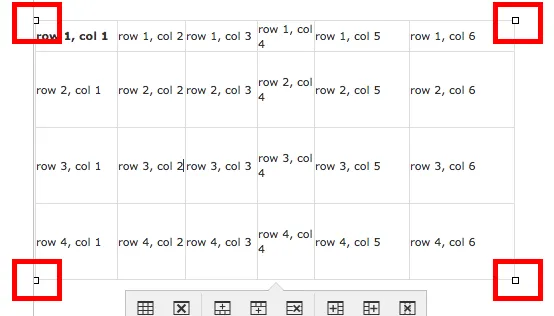
Another useful action you can take on tables is to resize them. To do it, all you have to do is to click on the little squares on the corner of the table (highlighted in red below), and to drag the borders to the desired position.
Furthermore, you will notice that when you click on a table, there is a small menu appearing below it. This menu provides access to several useful function shortcuts such as adding/deleting rows or columns. For example, clicking on the first item launches the Table properties menu.
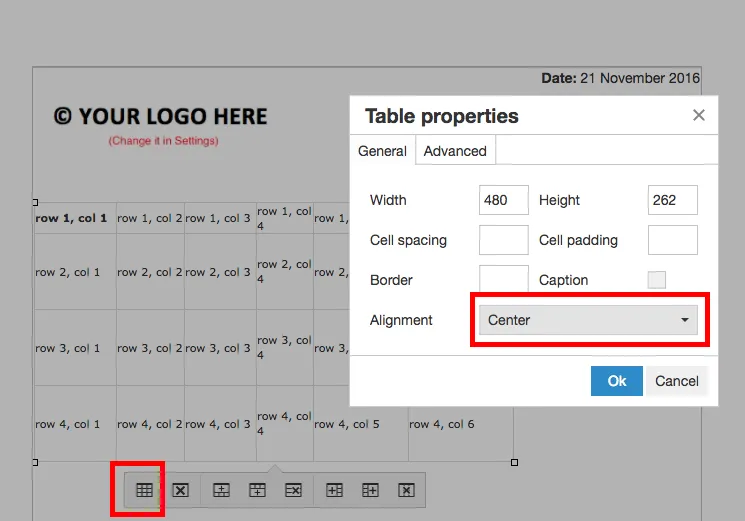
The *table properties menu* let's you: * change the borders of the table * change the size of the table * modify the appearance of the table * adjust the internal spacing within cells * etc
For example, changing the property of Alignment to Center will result in the table positioned in the center of your document as seen in the example below.
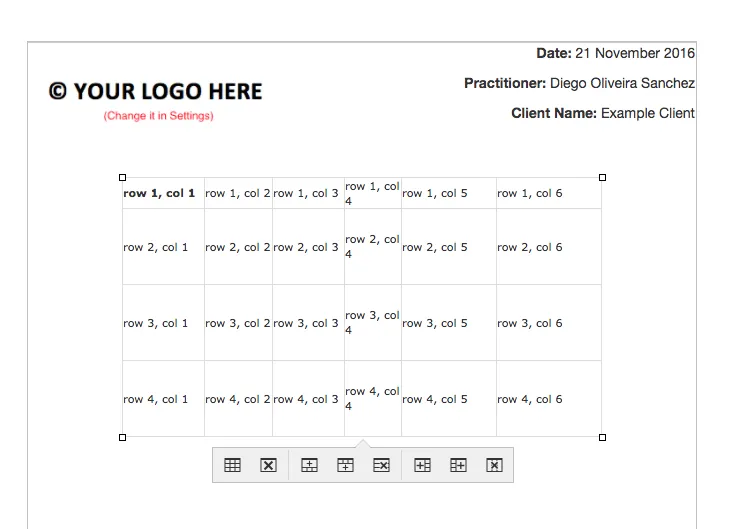
There are many options in the table menu to give you flexibility when creating and editing tables. Moreover, the same capabilities for editing that are available when writing content for a report are also allowed when creating templates. This means, you can do all of the tedious formatting once when creating a template, then re-use your content in multiple reports without duplicating the effort.
To read more documents and tutorials about NutriAdmin reports, please click here