This article explains how to create a master table of supplements to simplify recommending supplements to your clients. The idea is to store a master table containing all supplements (with their name, brand, usage, amounts, notes, etc) you normally use, and then to just choose which ones apply to a particular client to get a personalized report.
This concept can save you a lot of time in the long run, since it eliminates the need to constantly writing/copying the same data over and over.
If you have never created a report before, it is recommended you watch the 6-minute video introduction below first so that you understand how reports work:
Watch video tutorial on YouTube
Using report templates to recommend supplements to clients
The idea is to create a master table of supplements containing all the products you can recommend to your clients. Then, you can include the whole table into a client's report and eliminate the rows that are not relevant for the client. Removing rows is often much quicker and easier than adding the products you want to recommend one by one.
To get started with your master table of supplements, follow the steps below.
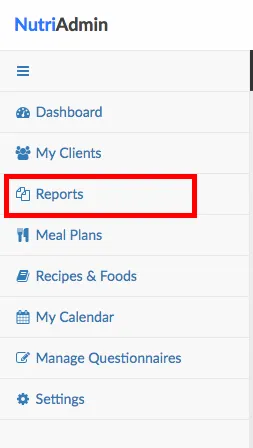
Step 1: Click on reports on the left-side menu.
Step 2: Click on New Report on the top-right corner of the screen.

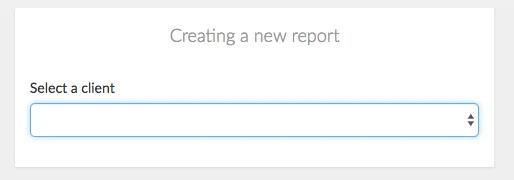
Step 3: Choose a client from the dropdown menu. If you are just testing, you can choose an Example client with dummy data.
Step 4: Tick or untick the different boxes for each data category to choose what data is included into your report.
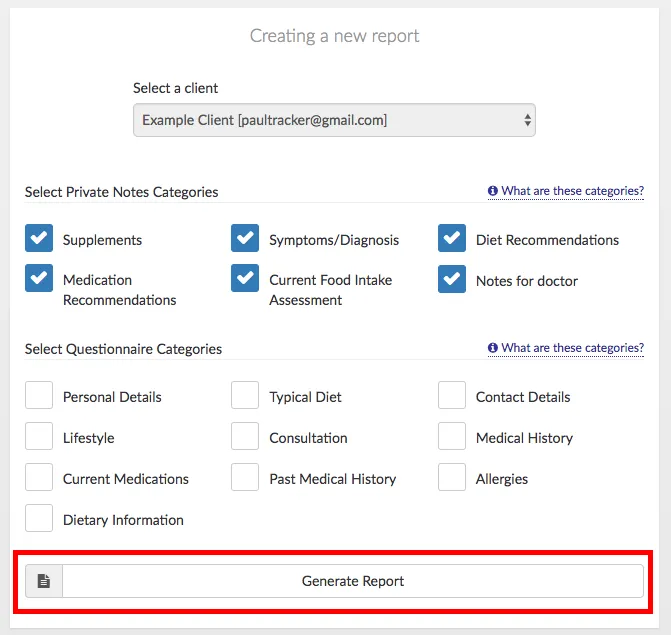
For the purposes of this example, you can untick everything so that the supplements table stands out more. After clicking on Generate report, a white page containing some basic information will be generated.
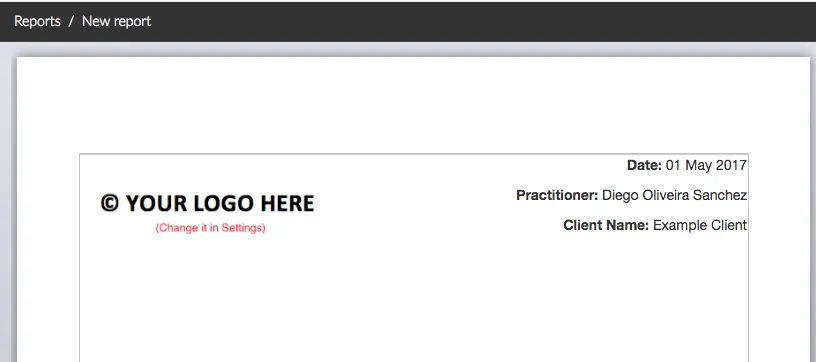
The key to manage your supplements is to use report templates. You can create one or multiple templates for your supplements in the area on the right-side of the screen. Then, you can re-use your templates in multiple reports with different clients
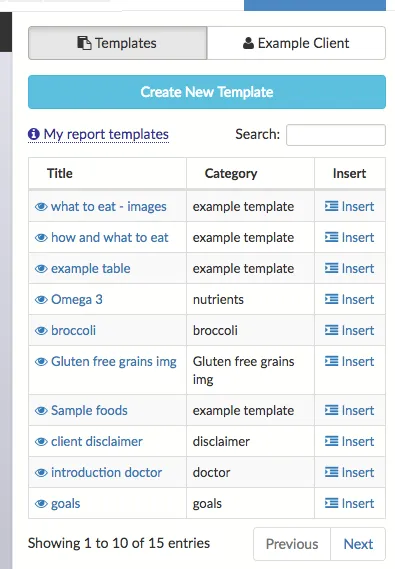
If you have never created a template before, you can click here for a step-by-step tutorial on report templates
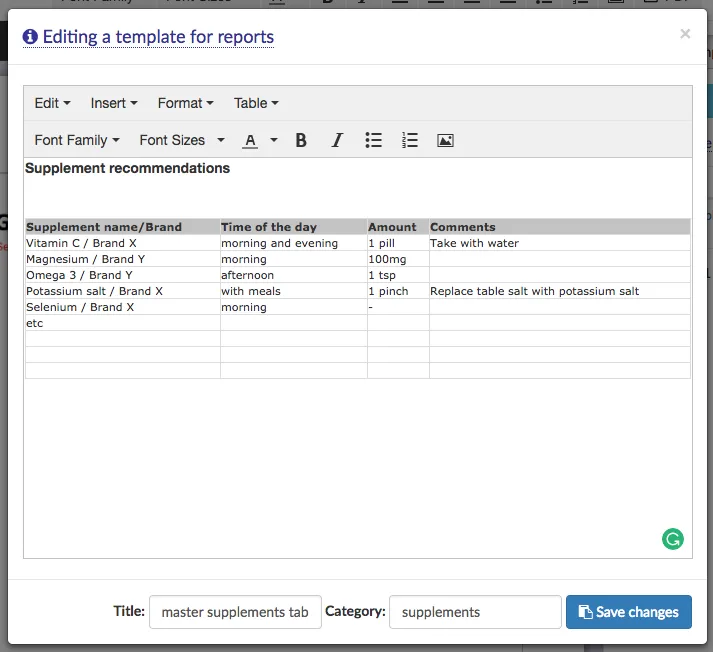
Step 5: Create a template for your supplements. You can choose any format you want. A popular idea is to create a large table with all possible supplements you use. Below is a simple example.
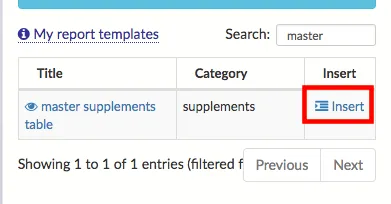
Step 6: Insert your supplements master table into the report by clicking on Insert.
The whole table will be inserted into the report as shown below.
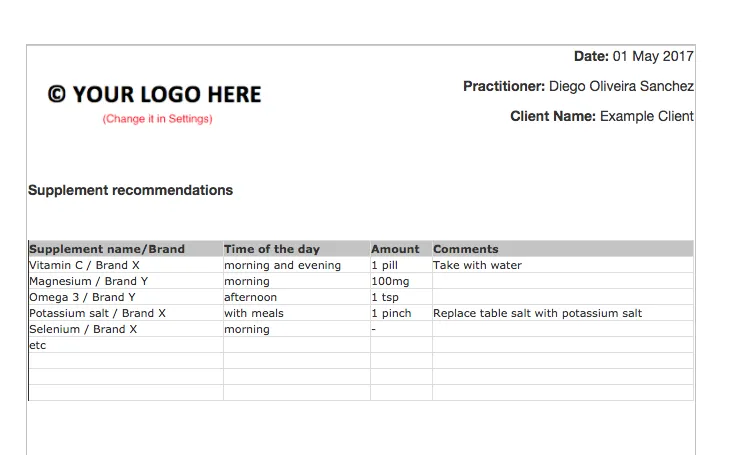
Step 7: When you insert the whole table of supplements into a report, you can select the rows that do not apply to your client and delete them as illustrated below.
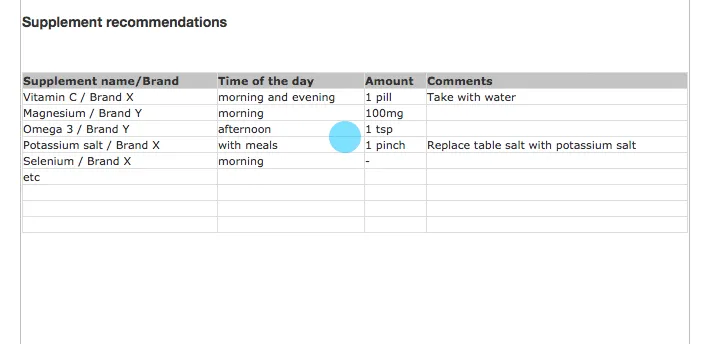
The end result should be a table containing only the supplements that your client needs.
Extra comments and alternatives
Regarding formatting, you can structure your table to have more or less rows, more categories, extra information, etc. You can also structure supplements into a bullet point list, paragraphs, etc. The choice is yours.
Creating a single master table has the advantage of ensuring you will never forget a given supplement (since all of the possible options will be contained in the table). The disadvantage is that if you are not careful you may forget to delete a supplement from the table and your client may think he/she needs to take some extra product you didn't intend to recommend.
An alternative to the method of creating a master table of supplements would be to create a single template for each supplement (grouped under the template category supplements or similar). This method would allow you to choose which supplements to add to a report one by one. The chances of inadvertently adding something extra are reduced, but now you need to watch out for forgetting to include some of the products into the report.
When you are done editing a supplements table, you can save the report and/or download it as a PDF. You can keep your report or hand it in to your client.