Normally during the signup process you can set your company data like logo, address, signature. Sometimes however, you may wish to change your branding and this tutorial will guide you how to do it step by step.
Why uploading your logo?
Nutriadmin provides you with customised branding, so that every communication with your clients look professional and is branded with your own logo and signature. Your branding will be visible for example when you send emails to your clients, when they book an appointment with you or fill in a health questionnaire.
Changing your logo
Step 1:
To change your logo, please go to the Settings menu (you can find it on the left-hand side menu bar)
Step 2:
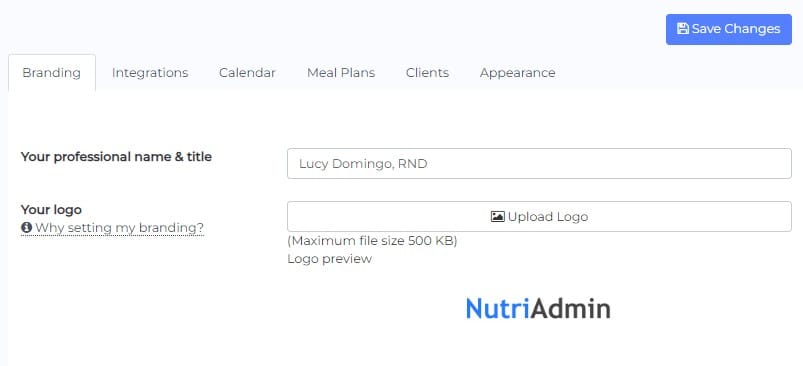
Once you are in the settings menu, you should see the Branding tab (as presented on the screenshot below).
Step 3:
To change your logo, click on the upload logo button and you will be prompted to chose a file from your computer. Choose the necessary file and you should see your new logo in the preview screen. Remember to click the Save Changes button to save the logo.
Note: Sometimes your file might be too large or have a wrong format. Your logo file should be under 500KB in size and under 1000px in height. If you experience any issues while uploading your image, please contact us at team@nutriadmin.com and we will help you adjust it.
Changing your signature
To change your signature follow the below steps:
Step 1:
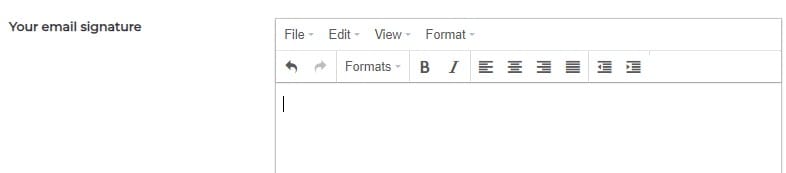
Go to the Settings menu and in the Branding tab scroll to the bottom. You should see a text box with a text editing tools on top (as per screenshot below )
Step 2:
Enter your signature in the text box and if you want you can additionally style it to match your branding. This signature will be used with all the client communications (for example, when sending emails).
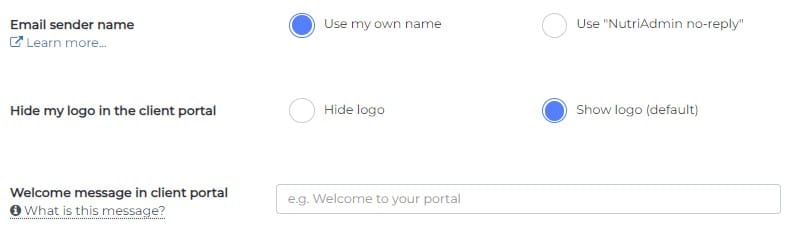
Email, Client Portal logo and welcome message
You have the option to display your name in NutriAdmin emails (such as appointment confirmations and reminders, questionnaires, etc.). In the Client Portal, you can also choose to hide or show your logo. Additionally, you can customize the welcome message that your clients see when they log in to their portal.