If you are sending many questionnaire emails with NutriAdmin, it is recommended you configure a default message per questionnaire. This way, you can save time and send many of your questionnaires with one click; removing the need of customizing them one by one every time.
Note: A similar operation can be done to change the default content in appointment slots emails
In order to customize your questionnaire emails default content, please follow these simple steps:
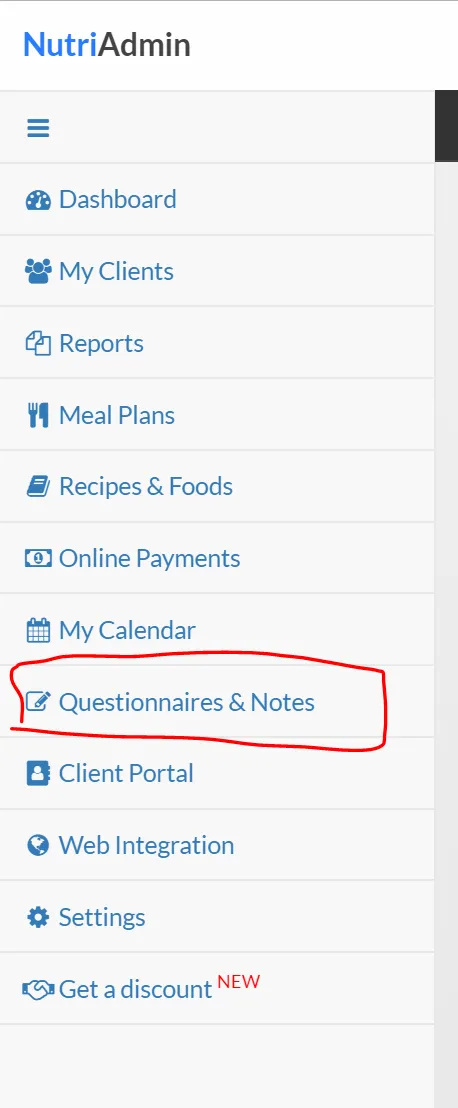
Step 1: Go to Questionnaires & Notes.
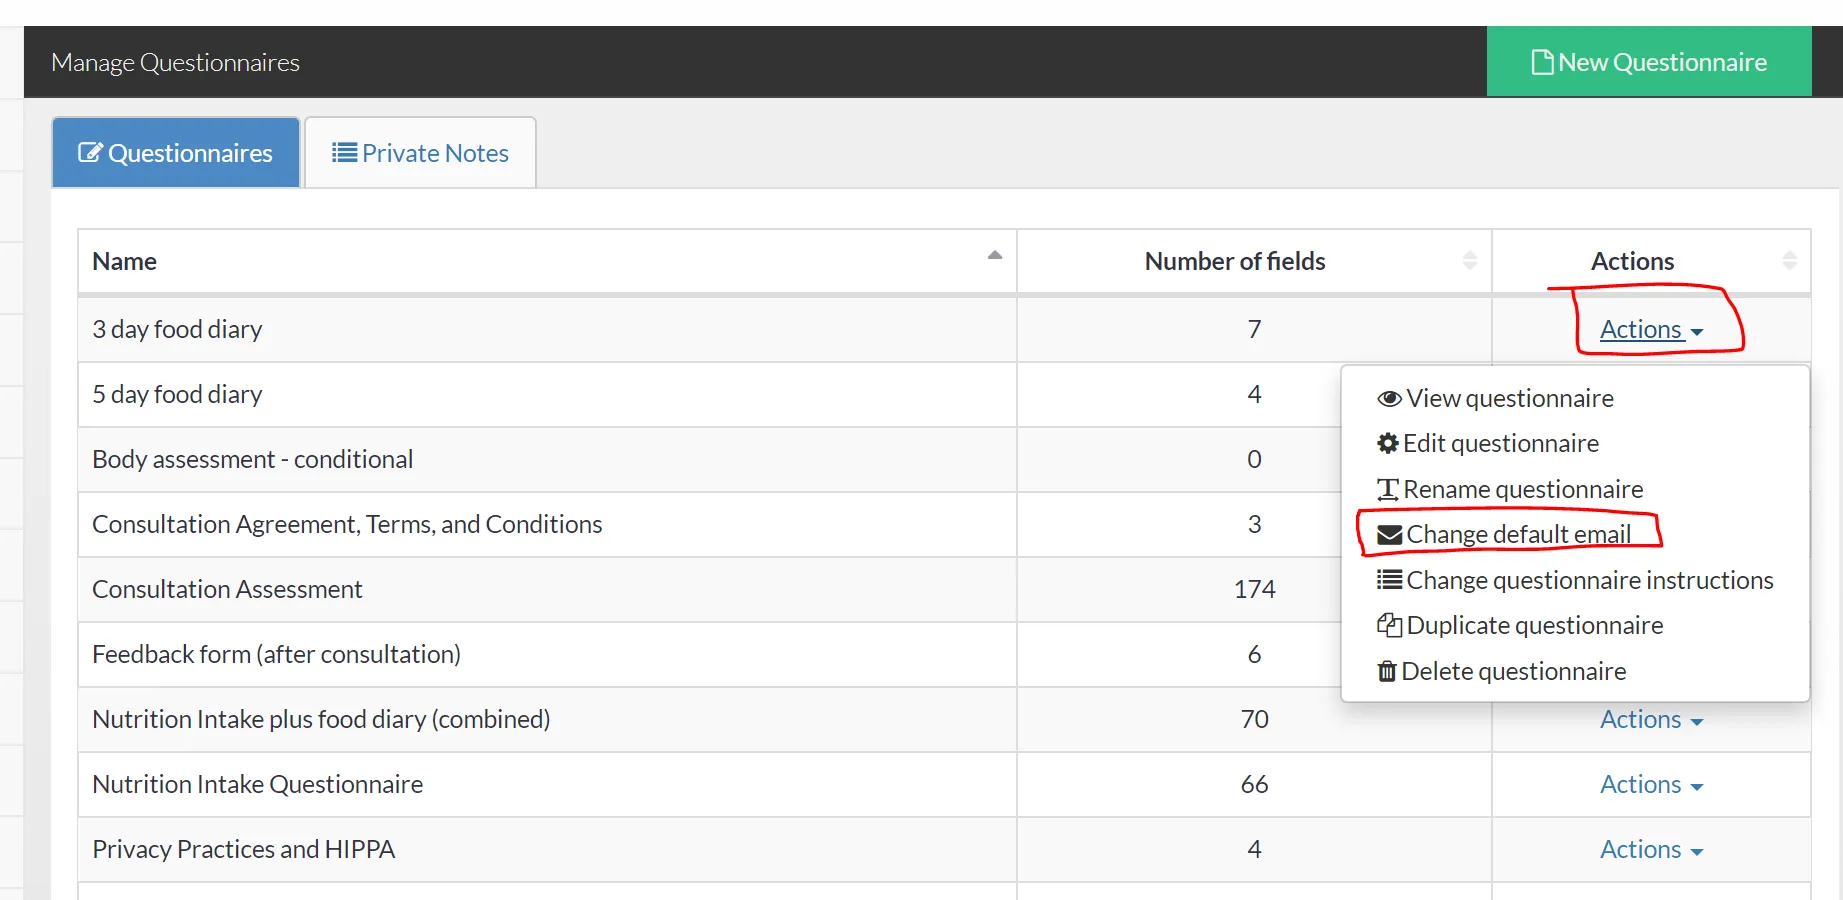
Step 2: Click on Actions, then Change default email for the questionnaire you wish to customize. In this example we'll customize a food diary questionnaire that contains a table where the client can enter the different food products he/she consumes over the week.
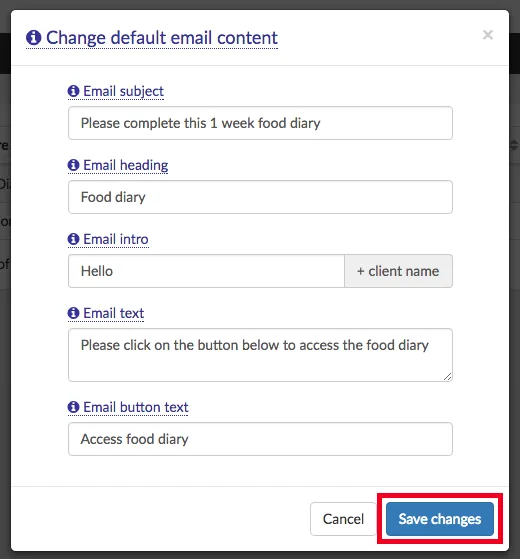
Step 3: Enter the different fields for your default questionnaire. There are 5 different elements available:
- Subject: This is the subject field of the email. E.g. Please complete a 1 week food diary prior to your consultation
- Heading: A big heading on top of the email, intended to grab the attention of the recipient. E.g. Food diary, or Health Questionnaire.
- Intro: A greeting, E.g. Hi, or Hello. Your client's first name will be automatically added to this intro fragment, so you don't need to specify any name here.
- Text: The main body of the email, including instructions and prompting your client to click the button to access the questionnaire. E.g. Please click the button below to complete a food diary.
- Button text: The text in the button that allows your client to access your questionnaire. E.g. View questionnaire.
Don't forget to click save changes when you are done editing your questionnaire's default email. Also, take into account that every questionnaire has a different set of default content attached, so you can set defaults separately for all your questionnaires. E.g. one for a food diary, another for a health questionnaire, etc.
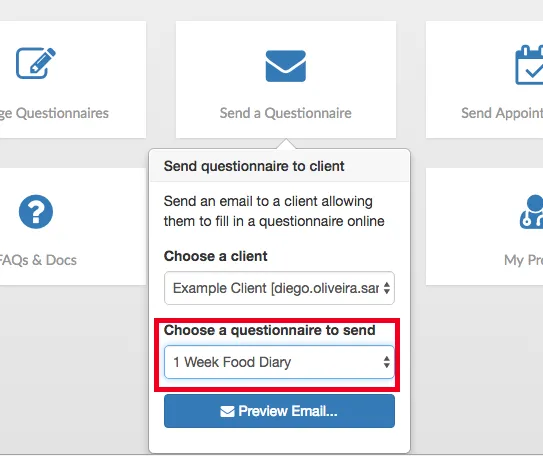
That's it! From now onwards, your questionnaire emails will contain the content you have specified by default. If you want to check if your changes worked you can:
- Go to Dashboard.
- Click on Send questionnaire email.
- Choose the questionnaire where you have customized the contents. In this example, a 1 week food diary.
- If everything worked correctly, you will see your custom default content in the email preview.
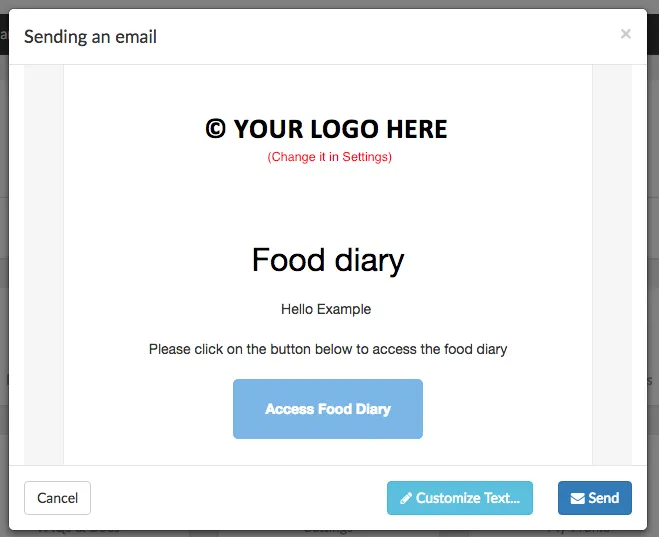
Final tips and comments:
- You can have different versions of questionnaires for different kinds of clients; each one of them with a different default email
- Once you've configured a few questionnaires, you can send them with one click in the text in the email is appropriate
- This is specially useful if you have questionnaires in different languages, as you will be able to send with 1 click the appropriate email/questionnaire pair to your client in the appropriate language.
- You can also change the default email for sending appointment slots to clients. Learn how by clicking here.