You can click here to learn how to configure multiple working schedules for different clinics, or if you work part time. For example, it's possible to setup a schedule for Thursdays only.
But, what to do if you want to configure a schedule for only the first Thursday of each month for example? Or what if you have a recurring workshop that happens on the last Sunday of each month?
We do not support a native feature to configure complex schedules like the ones mentioned above. However, there are a few workarounds you can follow to accomplish similar results:
- You can book manually events that happen only once a month. Since these events occur sporadically, the amount of work involved in manually booking them will be low.
- For events that happen once a month on a given day of the week, i.e. Thursday, you can set a schedule for Thursdays only. Then, you can configure a default email for clients saying something like: You can only choose the 2nd Thursday of the month. If a client books outside of the allowed range you can always reject the appointment suggestion from NutriAdmin, and ask them to book again.
- You can set a schedule for Thursdays, then manually create an event (saying something like busy, or unavailable) every other Thursday in the month where you don't work (there will be 3 or 4 per month, so you can block 3-4 months in advance in 5 minutes of work).
The above suggestions many not be ideal, but they will work. You can choose the option that suits you best depending on your particular schedule.
Other Tip to Make Appointment Schedules Look Simpler
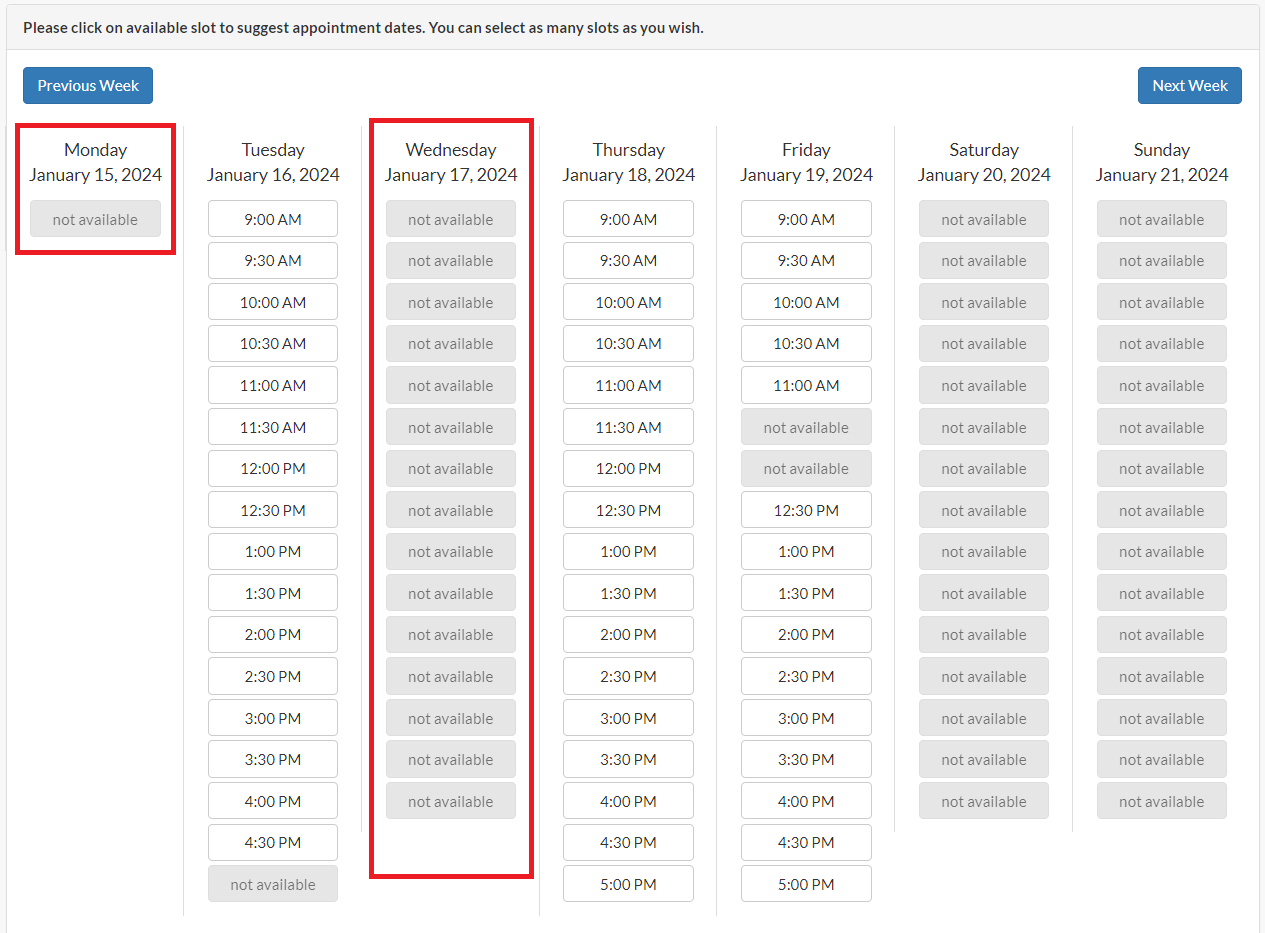
Currently the appointment slots will show multiple not available times, for days that you are not working. If you want make it look simpler and show only one not available for the whole day, you can follow this step-by-step tutorial.
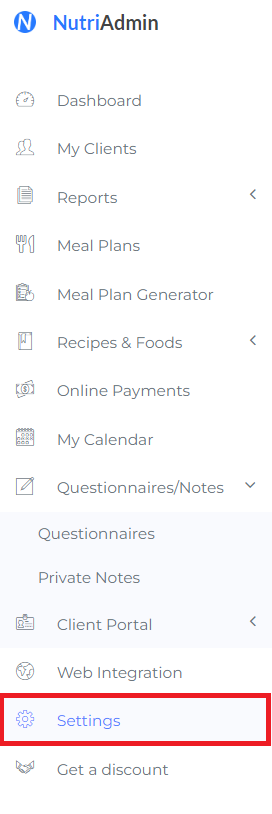
Step 1: On the left side of the screen, click Settings .
Step 2: Go to Calendar tab and scroll down to the lower part.

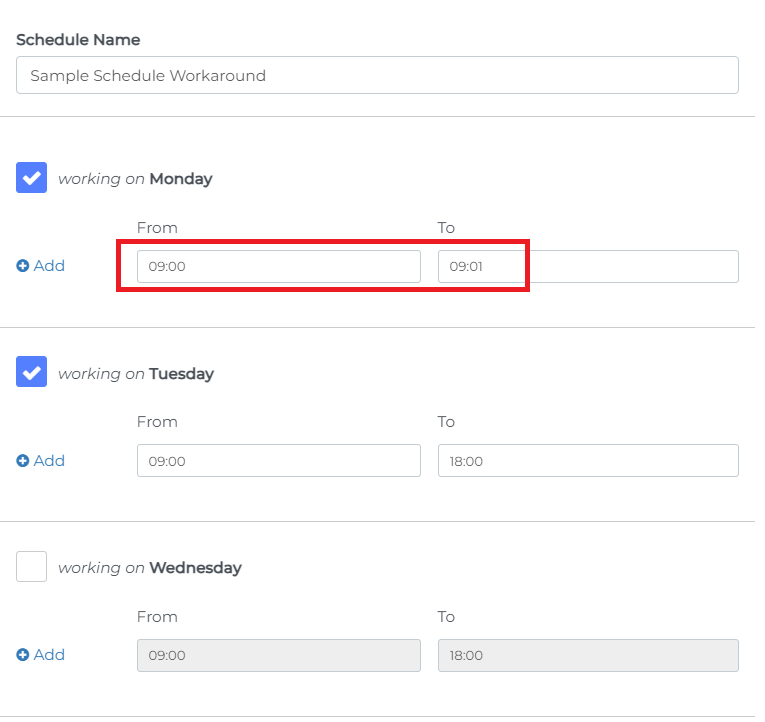
Step 3: You can either add a New working Schedule or Edit an existing one. For this example, I created Sample Schedule Workaround.

Step 4: Change the time for the day you are unavailable. Make a 1 minute interval time for the From and To parts as shown in the sample below.
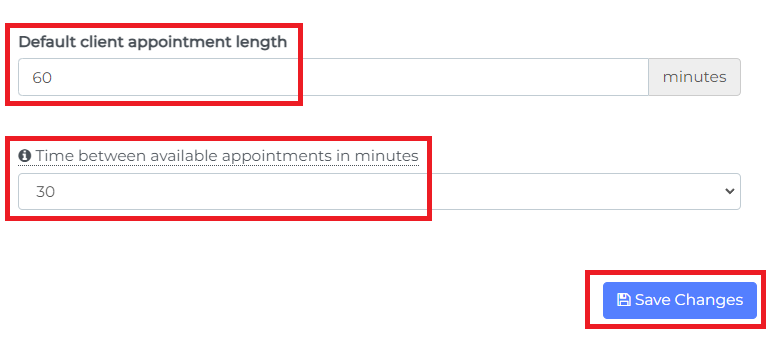
Step 5: Fill in other fields as needed then Save Changes.
Step 6: On your Google Calendar, you can create an event or Out of office schedule.
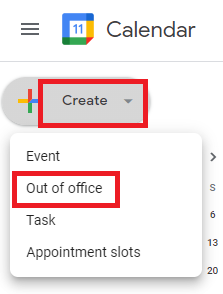
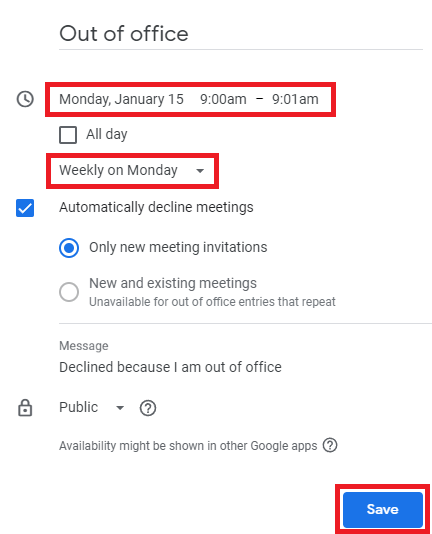
Step 7: You can set date and time to match the days and time you are not working. Don't forget to set to weekly to make it a recurring event then Save. You can also block the entire day if you don't have any schedules for that certain day.
The screenshot below shows how this would look like. Monday shows the result of the tutorial while Wednesday shows how it would normally look like.
