This tutorial will guide you configure multiple schedules in your NutriAdmin account.
Why setting up multiple working schedules
This is especially useful when you work at different practices/clinics, part time as a nutritionist or dietitian, or your schedule changes from time to time.
With different schedules configured, you will be able to choose which one you want to use when you send appointment slots to a client. Your client will be able to book in an appointment with you only on the dates that fall into the valid range for the schedule you chose.
Setting up different working schedules video tutorial
To learn how to configure multiple working schedules, you can follow the steps below. Alternatively, you can watch this step-by-step video (It's recommended you watch the video in HD and full screen).
Watch video tutorial on YouTube
How to setup multiple working schedules step-by-step guide
Step 1: Click on Settings in the right hand side menu.
Step 2: Click on the Calendar tab.

You will see a table with your existing schedules similar to the one shown below
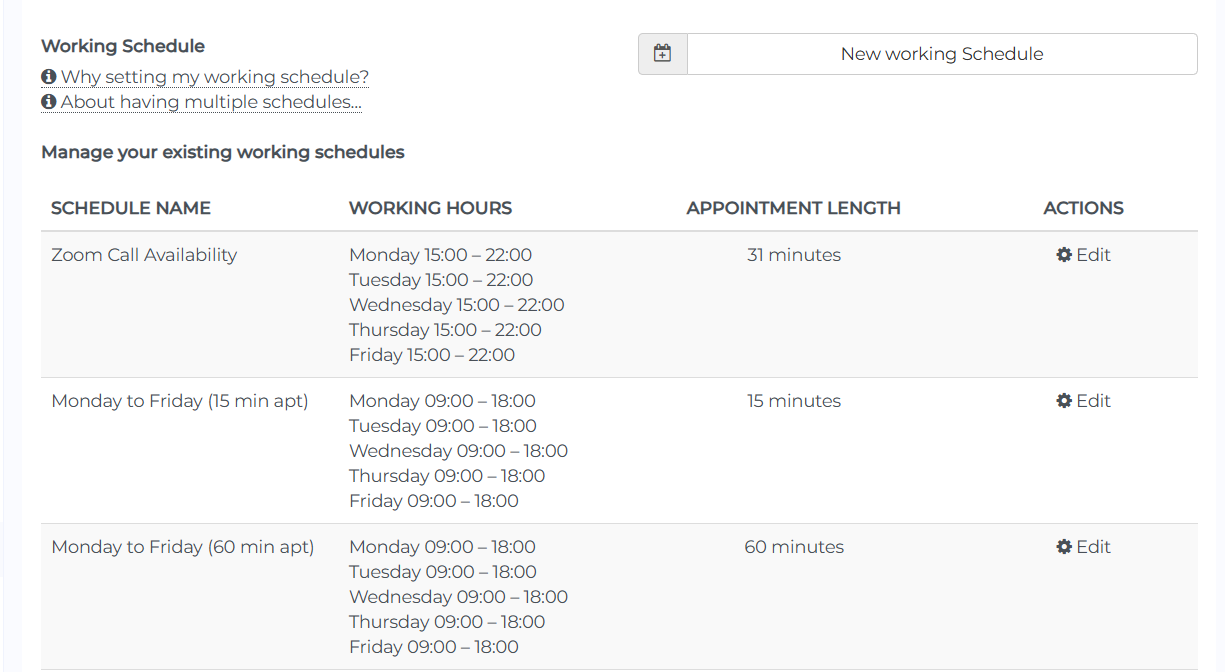
Step 3: By default, NutriAdmin will provide you with several working schedules with different combinations of working days (Monday to Friday vs Weekends) and appointment lengths (15 min, 20 min, 30 min, etc). To edit an existing schedule, you can click on the Edit button.

Step 4: Set your working days. In the modal window that will pop up after clicking Edit, tick/untick boxes like the one shown below to activate/deactivate the days you work in for your default schedule.

Step 5: You can adjust your working hours by typing in the From/To boxes. It's necessary to enter hours in the format HH:MM, e.g. 09:00 for 9AM. If you use a different format, the system will print an error message.

Step 6: It is possible to break the working hours for any given day into different chunks. This is useful if you want to include a lunch break or similar. Simply click on the Add/Remove buttons to create as many time segments as necessary. The example below shows a working schedule from 9AM to 1PM, and then from 2PM to 6PM (with a one hour break in between).

Step 7: Repeat the process of setting up your hours for the different days of the week.
Step 8: Scroll down and click Save Changes when you finish editing your first working schedule.

Step 7: When you are done editing your first working schedule, you can click on New working schedule. This will allow you to create a separate working schedule, independent of the first one.

Step 8: You can rename schedules. It's useful to give them meaningful names, such as Saturdays only, Gym classes, or Workshops. Including the associated appointment length, or days of the week can be useful too. E.g. Gym classes, Tue-Fri, 75 min.
Step 9: You can repeat the above steps to create as many schedules as you need, rename them, and change the days and working hours. When you are done, remember to click Save Changes on the bottom of the modal window.
Done! Your multiple schedules are now setup, and you can use them to send appointment slots to clients as appropriate from now onwards.