There are a few options in NutriAdmin that will enable you to customize your calendar to your preferred settings. This article explains which options are available, and where to find them.
To customize your calendar, follow these steps:
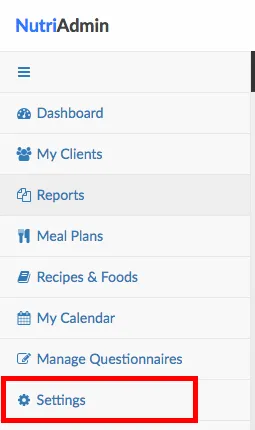
Step 1: Click on Settings.
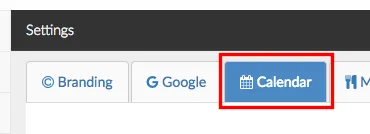
Step 2: Click on the Calendar tab.
Step 3: Choose your settings amongst the available options.
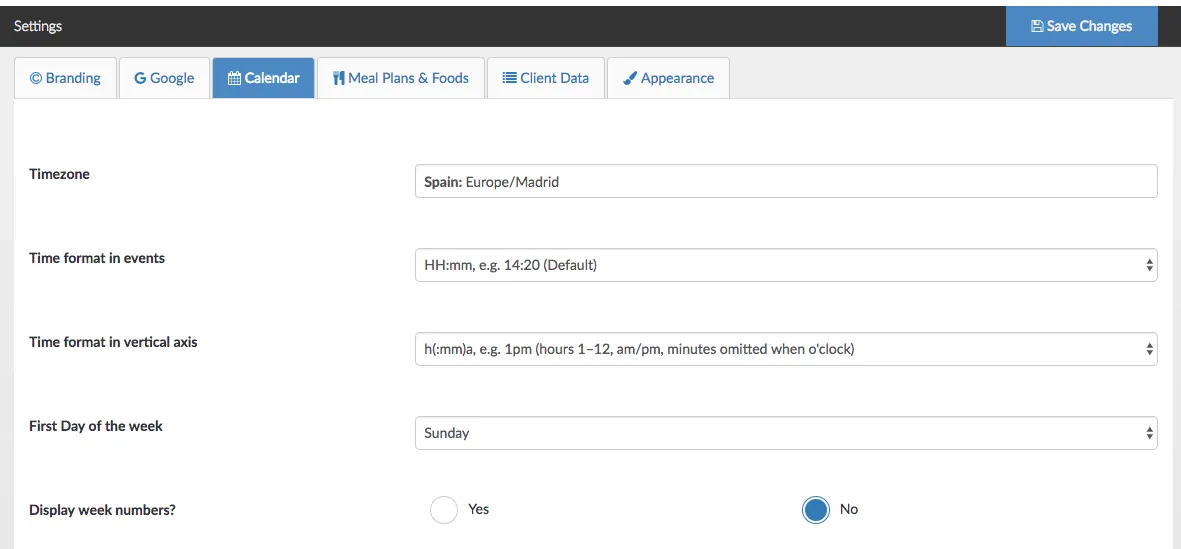
Step 4: Don't forget to click on Save Changes on the top-right corner of the screen once you are done editing your calendar settings.

Explanation of the different calendar options
1. Timezone
It is crucial you choose the right timezone for the geographical area where you work. This will ensure your appointments and events are displayed correctly in your calendar.
If you choose the wrong timezone, you will notice your events are shifted by a certain amount of hours in the calendar.
If you are traveling across timezones, it is recommended you change to the new timezone in the settings for the duration of your trip, so that you get all events in your local time.
2. Time format in events
You can choose your preferred format for displaying the time in events in your calendar.
The different options will allow you to:
- Use 24-hours time, or 1–12
- Explicitly indicate AM/PM, or omit it.
- Show AM/PM in capital letters, or in lowercase
- Show leading zeros when using 24-hours time, or omit them (e.g. 01, 02, 03... versus 1, 2, 3...)
- etc
Each option in the drop-down menu contains a short explanation of its effect. If you find the jargon too technical, don't worry – you can just try all of the options in sequence, check their effect in the calendar, and keep the one you like the most.

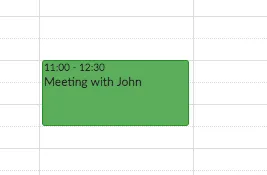
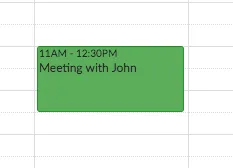
Below are two examples of how the same appointment looks like in the calendar for the two options highlighted in the screen-shot above.
Format HH:mm (Default). The time shows as 11:00 - 12:30.
Format h(:mm)A. The time shows as 11AM - 12:30PM.
3. Time format in vertical axis
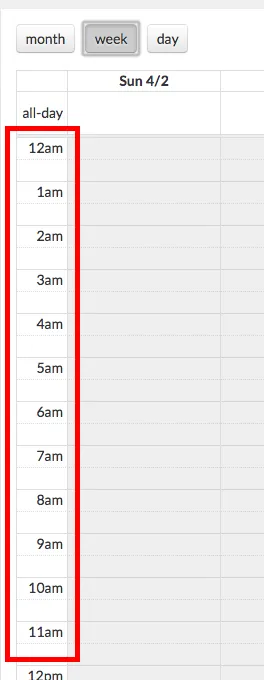
This setting affects the way in which the vertical axis is displayed. This axis is relevant for the Week and Day views, and is located on the left side of the calendar.
For an explanation of the options available, please check the previous explanation for Time format in events. The formatting options are the same.
4. First day of the week
You can choose which day will show as first in the week view of the calendar. Normally, you would choose Sunday or Monday, but other options are available too.
5. Display week numbers
If you choose Yes, the week number of the year will be displayed on the left side of the calendar. For example, for week 5 (early February) you will see W5 on the calendar.