NutriAdmin allows you to save a variety of email templates to be sent automatically when:
- You setup a new appointment with a client
- You update an existing client appointment
- You cancel an existing client appointment
- You schedule an email reminder to be sent automatically prior to an appointment
Each email template can contain a custom address. This is specifically useful if you work on multiple locations. You can also leave the address field blank if you work with clients online.
This tutorial explains step-by-step how to setup your email templates and how to use them.
Setting up calendar email templates
Follow these steps to configure your own calendar email templates.
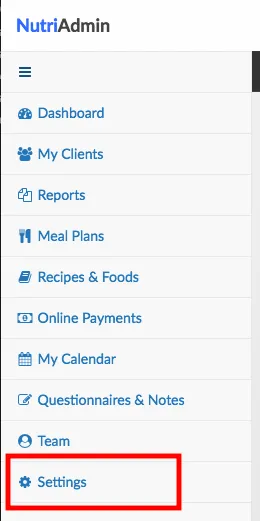
Step 1: Click on Settings on the left-side menu.
Step 2: Click on the Calendar tab.

Step 3: Scroll down until you find the button to Customize calendar emails.

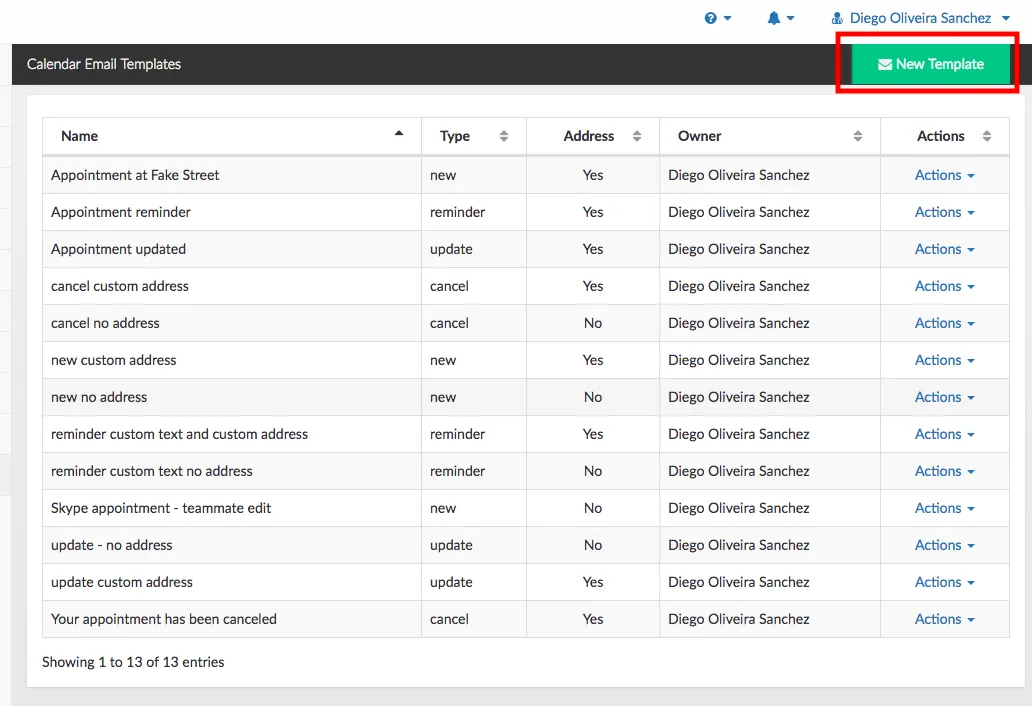
Step 4: Once you are in the Calendar Email Templates screen, you will be able to see any existing email templates you have already created. If this is the first time you visit this screen, the table will be empty. Click on New Template on the top-right corner of the screen to create a new email template.
Step 5: Enter a descriptive name so that you can recognize your email template later.
For example, you could create a Skype calls email template for clients with whom you have video-conference calls only. This email could specify your Skype username, and other relevant information. The physical address of where your are based would be omitted since it wouldn't be relevant.
On the other hand, you can also setup different email templates with different addresses if you work on different clinics/locations.
Step 6: Choose an email type. There are 4 types available:
- new: for emails to be sent when a new appointment is scheduled. The email can say something like (Here are the details for our upcoming appointment).
- update: for emails to be sent when you update an already existing appointment with a client. E.g. Your previous appointment has been updated. Here is the new date/time.
- cancel: for emails to be send when you cancel an appointment. E.g. Your appointment has been canceled as requested.
- reminder: for emails to be sent when you schedule a reminder prior to an appointment. E.g. Here is a reminder for your appointment in 24 hours..
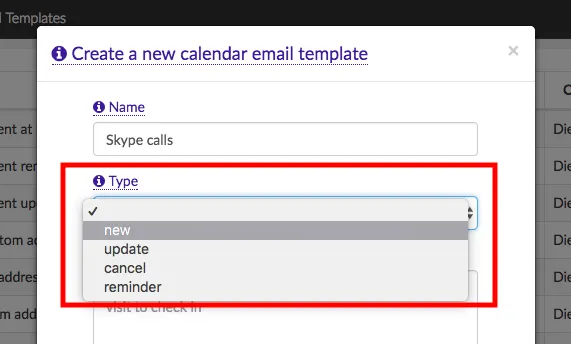
You can always edit these parameters later if you make a mistake. You can also hover with your mouse over the different labels in the form (name, type, etc) for help.
Step 7: Enter the main email text and, optionally, the address if this email is for appointments in a physical location such as an office, practice, or clinic.
Click the Save Changes button when ready.
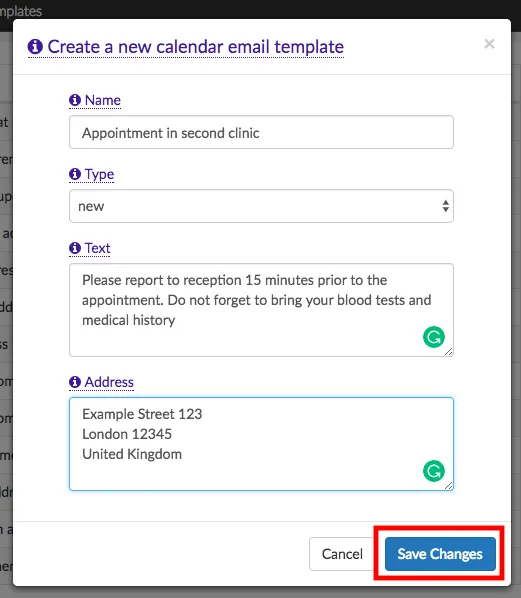
All emails will contain your logo, email signature, the client's name, and the appointment time automatically – so you don't need to worry about this.
Your new calendar email template will show up in the table.

You can always click the Actions button later to edit or delete any of your existing email templates.

How to use saved calendar email templates.
When creating an event in the calendar, you will get a couple of drop-down menus to customize the email templates you want to send to your client. Below are a couple of example screenshots.
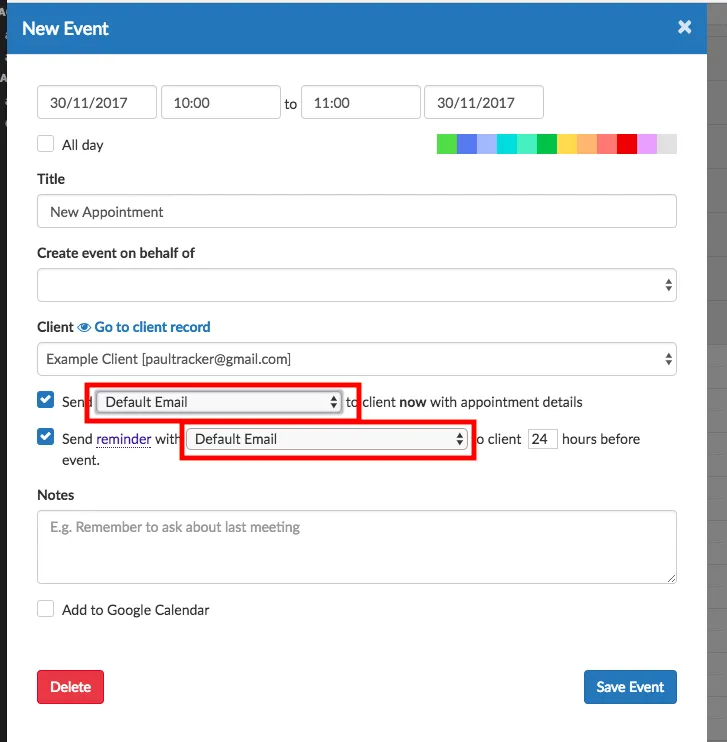
Here is the dropdown with email templates for new appointments.

And here is the dropdown with email templates for reminder emails.

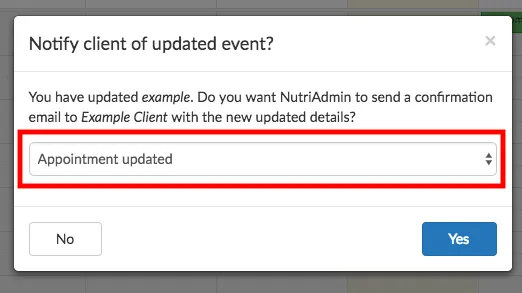
Additionally, when you update a calendar event with a client, you will automatically get a pop-up modal window that will let you click a button to email your template to your client.
The same is true when you cancel an event. NutriAdmin let's you select from a drop-down which email template you want to send to your client.
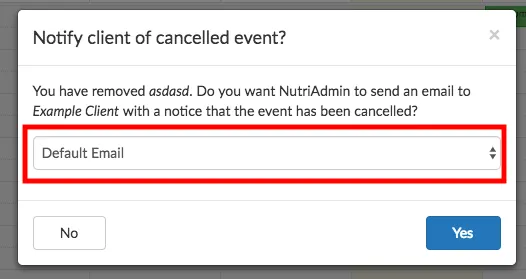
In all the examples above, you can opt for the Default Email. This is a very basic email that will use your existing NutriAdmin address (click here to learn more) and a sentence explaining wether the appointment is new, updated, canceled, or just a reminder.
Finally, you will also get the option to choose which email template to use when confirming an appointment suggested by a client using the appointment slots functionality

You can click here to learn more about appointment slots.
If you’re looking for ready-to-use email templates, this article is a helpful resource you can easily refer to and customize for your practice.