This article is especially relevant if you have configured several working schedules in NutriAdmin. If you haven't done so yet, it's recommended you check this article first.
If you are sending appointment slots emails with NutriAdmin often, it is recommended you configure a default message per working schedule. This will save you time in the long run.
Follow the steps below to setup your default email for each one of your working schedules
Step 1: Go to Settings.
Step 2: Click on the Calendar tab.

Step 3: Find the working schedule you wish to edit, and click on the Edit button.

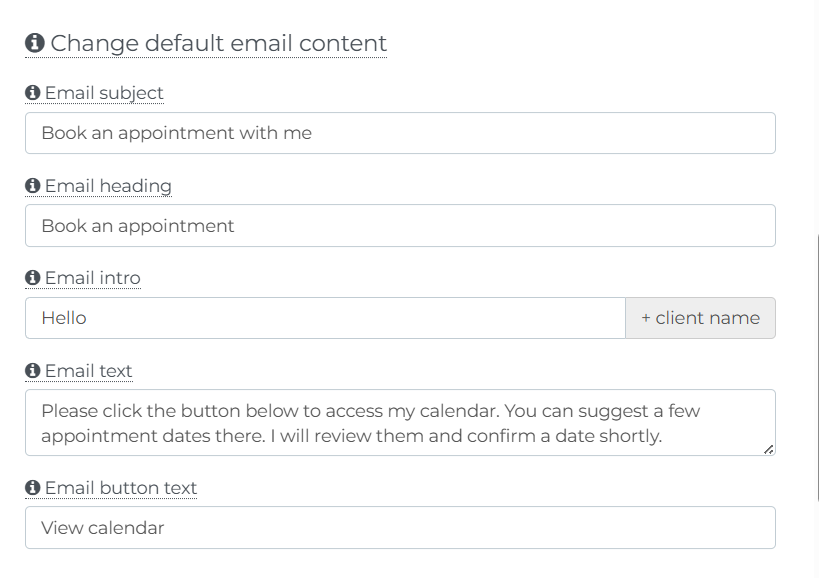
Step 4: In the modal window that will pop up, scroll down to find the Default email area. Enter the different fields for your default appointment slots email. There are 5 different elements available:
- Subject: E.g. Please book an appointment with me
- Heading: A big heading on top of the email, intended to grab the attention of the recipient. E.g. Book an appointment.
- Intro: A greeting, E.g. Hi, or Hello. Your client's first name will be automatically added to this intro fragment, so you don't need to specify any name here.
- Text: The main body of the email, including instructions and prompting your client to click the button to access your calendar and suggest appointment dates. E.g. Click the button below to book an appointment date.
- Button text: The call-to-action text in the button that allows your client to access your calendar. E.g. View calendar or book appointment.
Step 5: click on Save Changes on the bottom-right of the modal window.

Done From now onwards, your appointment slots emails will contain the content you have specified by default. If you want to check if your changes worked you can:
- Go to Dashboard.
- Click on Send appointment slots.
- Choose the working schedule where you have customized the contents.
- If everything worked correctly, you will see your custom default content in the email preview.
Remember that you can also change the default email for sending questionnaires to clients. You can learn how by clicking here.