This guide applies to creating a new questionnaire or customizing an existing questionnaire. The process is the same for both cases.
Creating a new questionnaire in NutriAdmin is easy. You can watch the following two videos explaining how the process works step-by-step.
7-minute video showing the basics of creating/editing a questionnaire.
Watch video tutorial on YouTube
8-minute video discussing the different possibilities for data fields in your questionnaires.
Watch video tutorial on YouTube
For a step-by-step tutorial on creating questionnaires, follow the instructions below.
Step 1: Go to Questionnaires, either in your dashboard or by selecting it from the tabs on the left side.
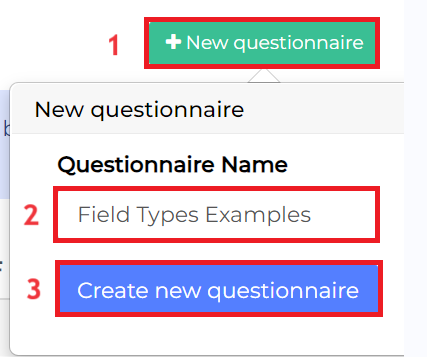
Step 2: On the right side of your screen, click on the green + New questionnaire button. Give your questionnaire a name then select Create new questionnaire once you're done.
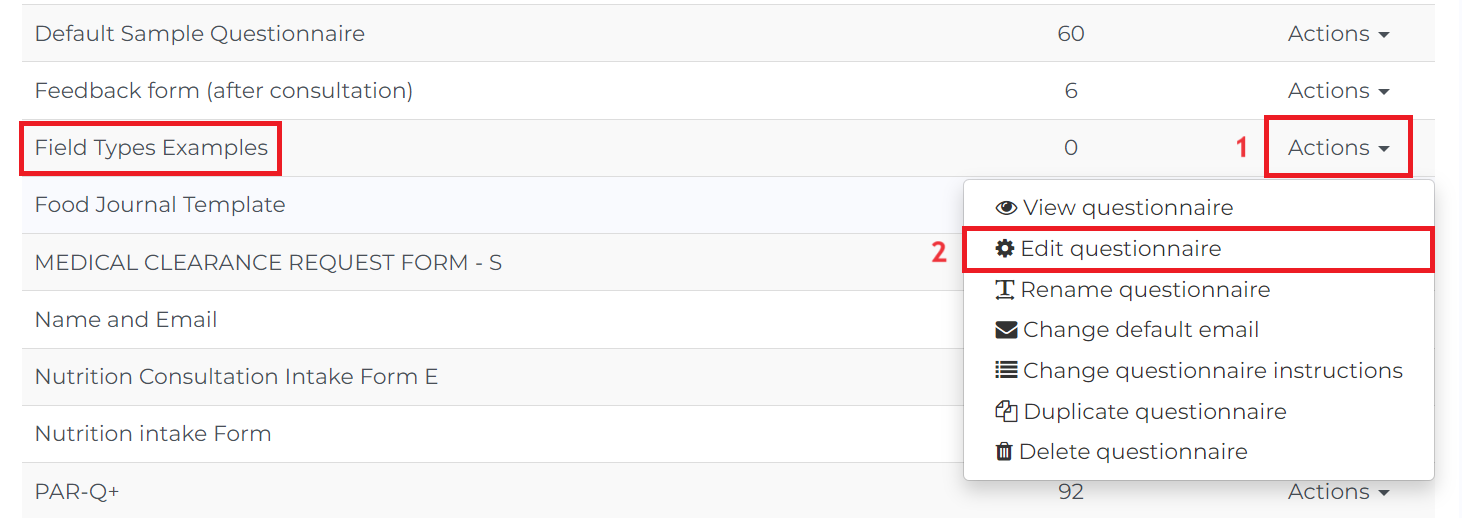
Step 3: Look for your newly created questionnaire. Click Actions then Edit questionnaire.
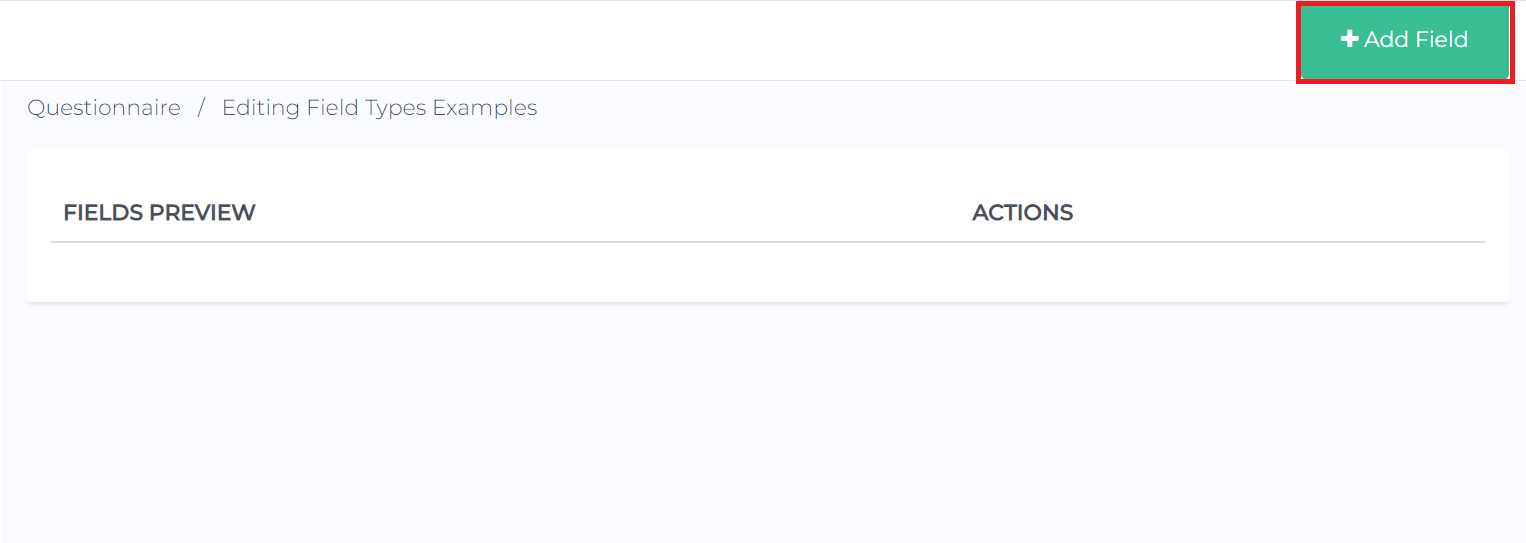
Step 4: Click on Add Field.
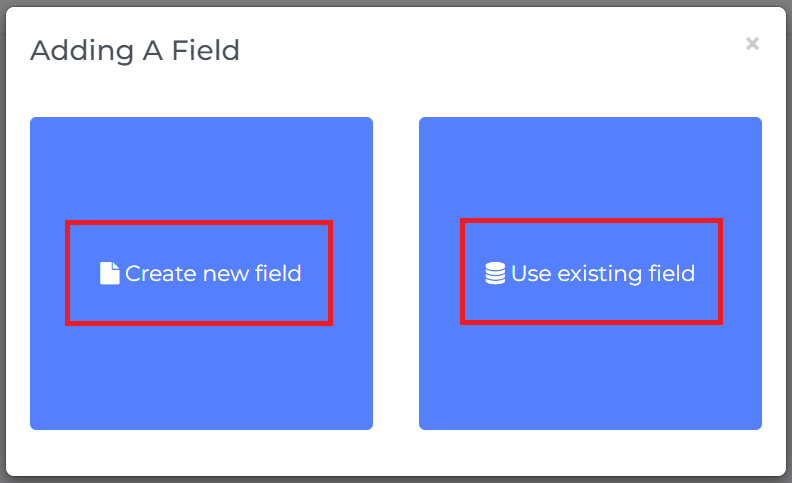
You have two options when you add a new field. You can either create a new field or use an existing field.
- Create new field - create a field from scratch.
- Use existing field - if you have an existing field from another questionnaire or NutriAdmin's default questionnaires that contains the same content as the field you're trying to add, you can copy it directly. This will save you time from manually typing in field details.
Use existing field
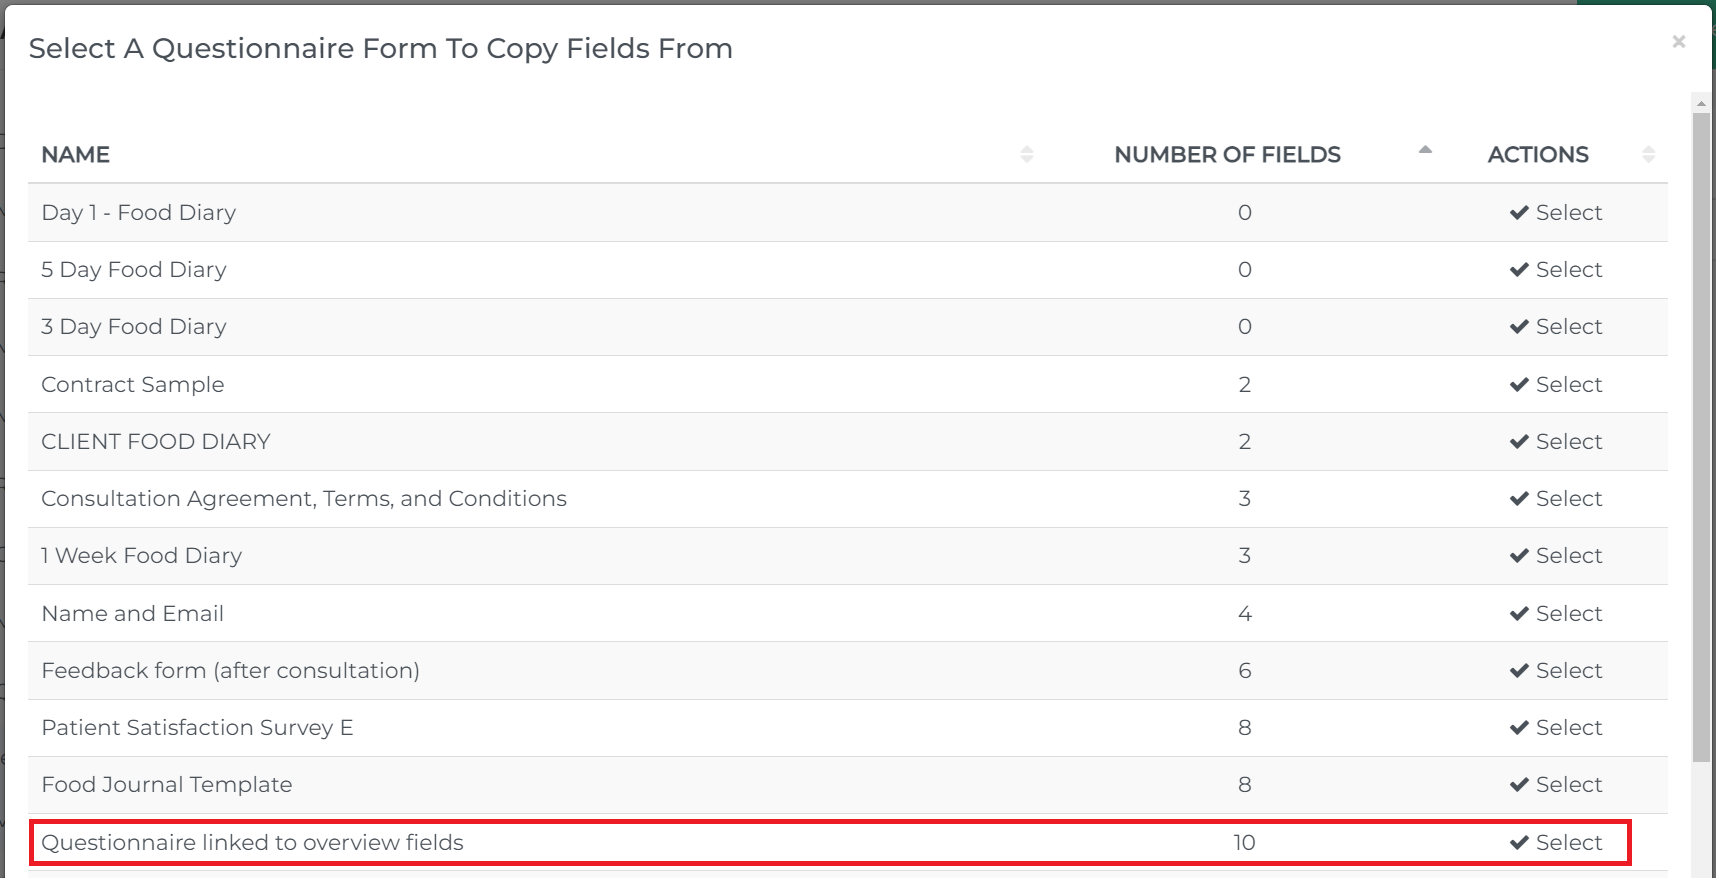
Once you choose Use existing field, other existing questionnaires you saved and defaullt questionnaires from NutriAdmin will be shown.
Select the questionnaire where the existing fields you want to copy are located. In this example, I'm going to use Questionnaire linked to overview fields.
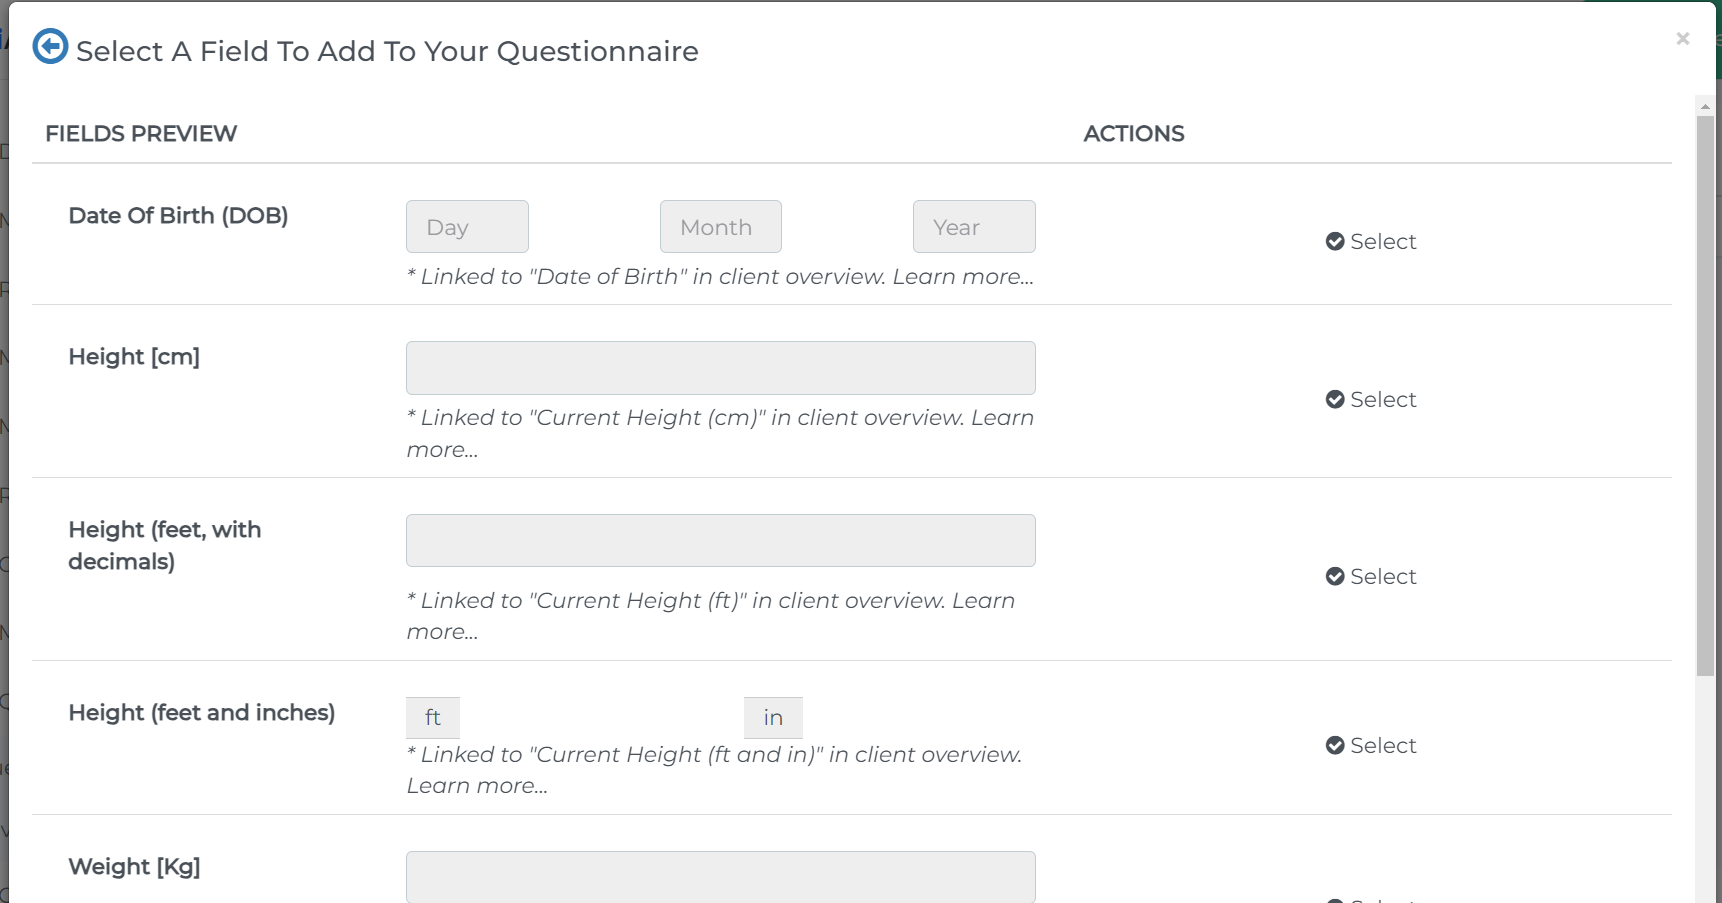
You can now select the field that you need.
Then, insert it wherever you want it to appear. In this case, since we just created this questionnaire, there are no other options yet.

Questionnaire linked to overview fields
Just a brief overview of this specific default questionnaire: it contains fields with information that, once the client answers them, will automatically be reflected in the client overview on your dashboard. This includes the following:
- Date of Birth
- Height (cm, ft with decimals, or ft/inches)
- Weight (kg or lbs)
- Gender
- Are you pregnant or lactating?
- Body Fat %
- Activity level
Create new field
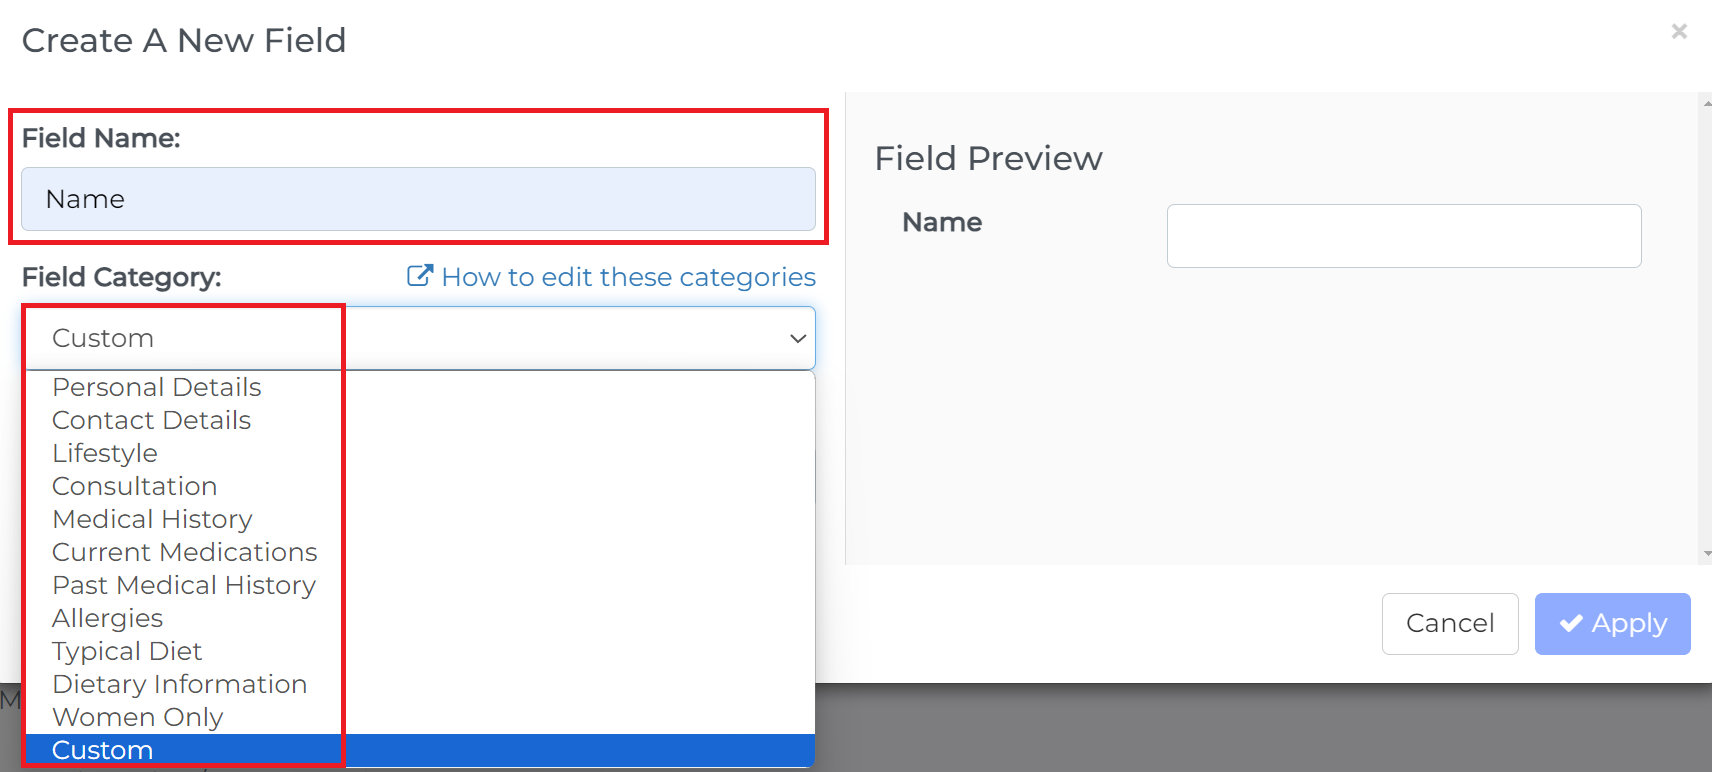
When you create a new field, you will see four sections.

Field Name - This is where you type in your questions or short instructions.
Field Category - You can select a category for specific fields. This can help in generating reports. For more information about this, read more here.
Field Preview - This is a preview on what the field would look like in a client's point of view.
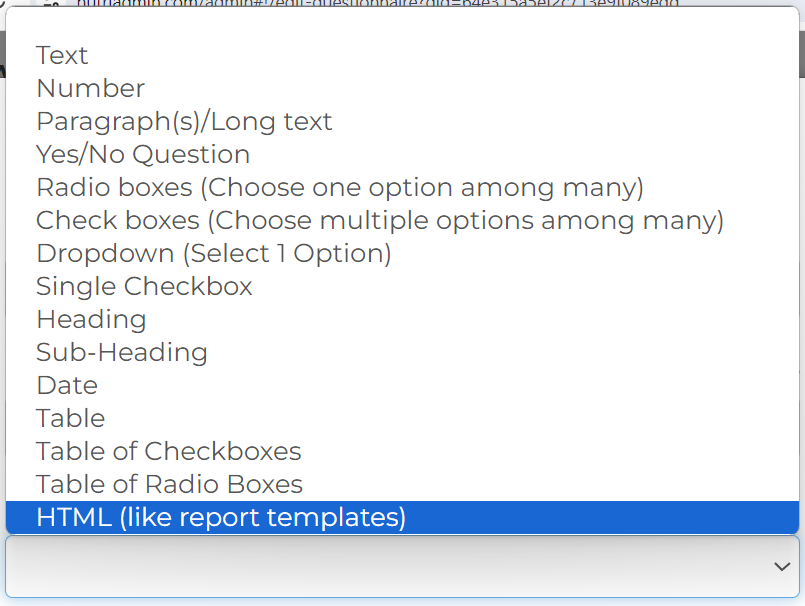
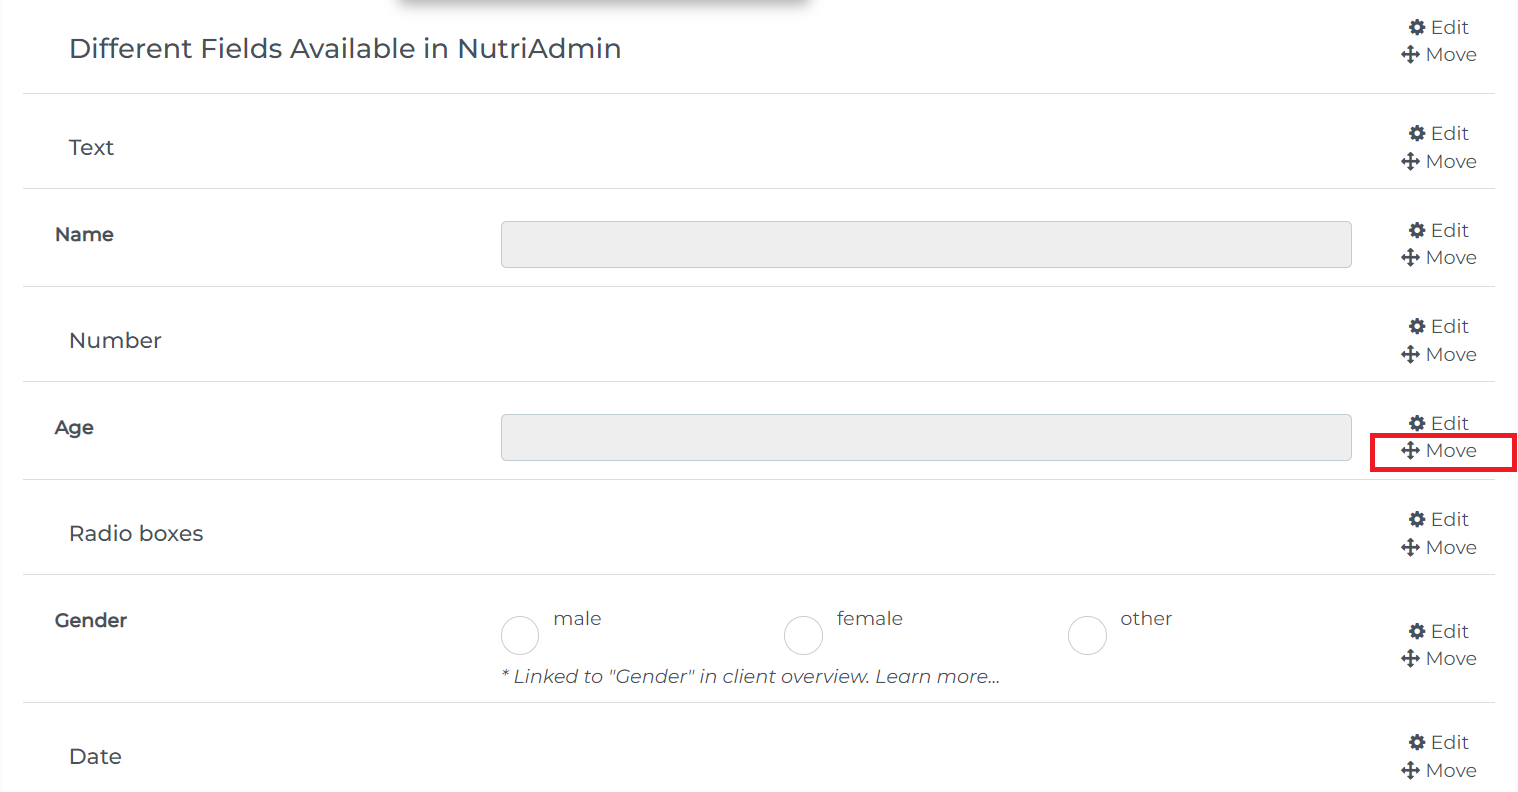
Field Type - you can make different types of fields depending on your need as shown in the screenshot below.
How to move fields
Click on the Move button on the right side of the field you want to move. For this example, we're going to move Age.
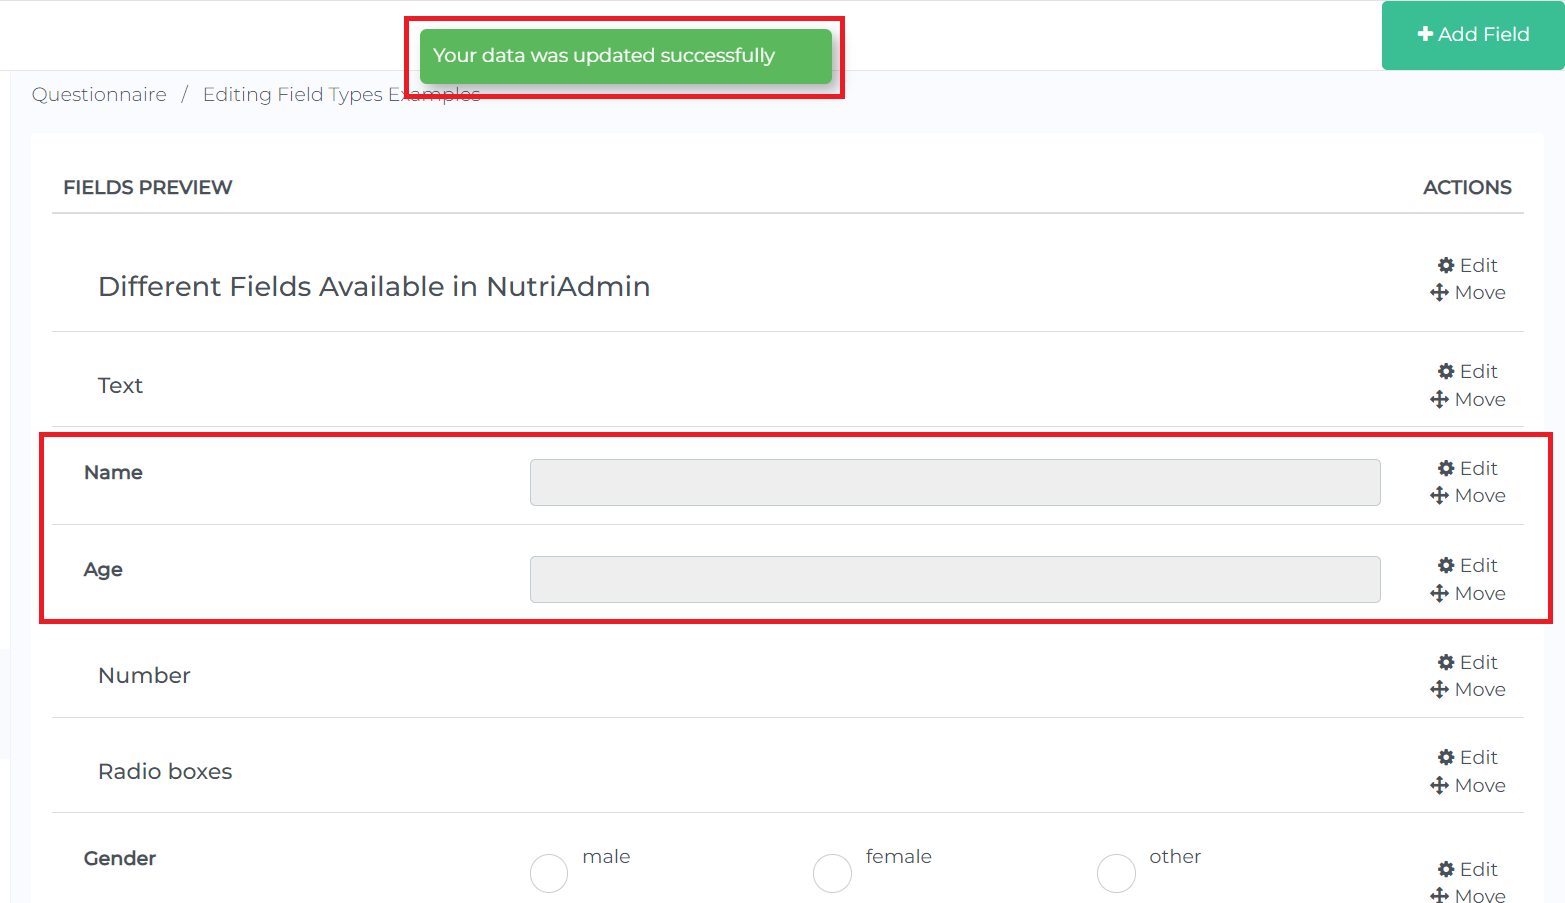
After you select Move, green lines with Move field here will appear in between each field. You can choose where you want to move your selected field.
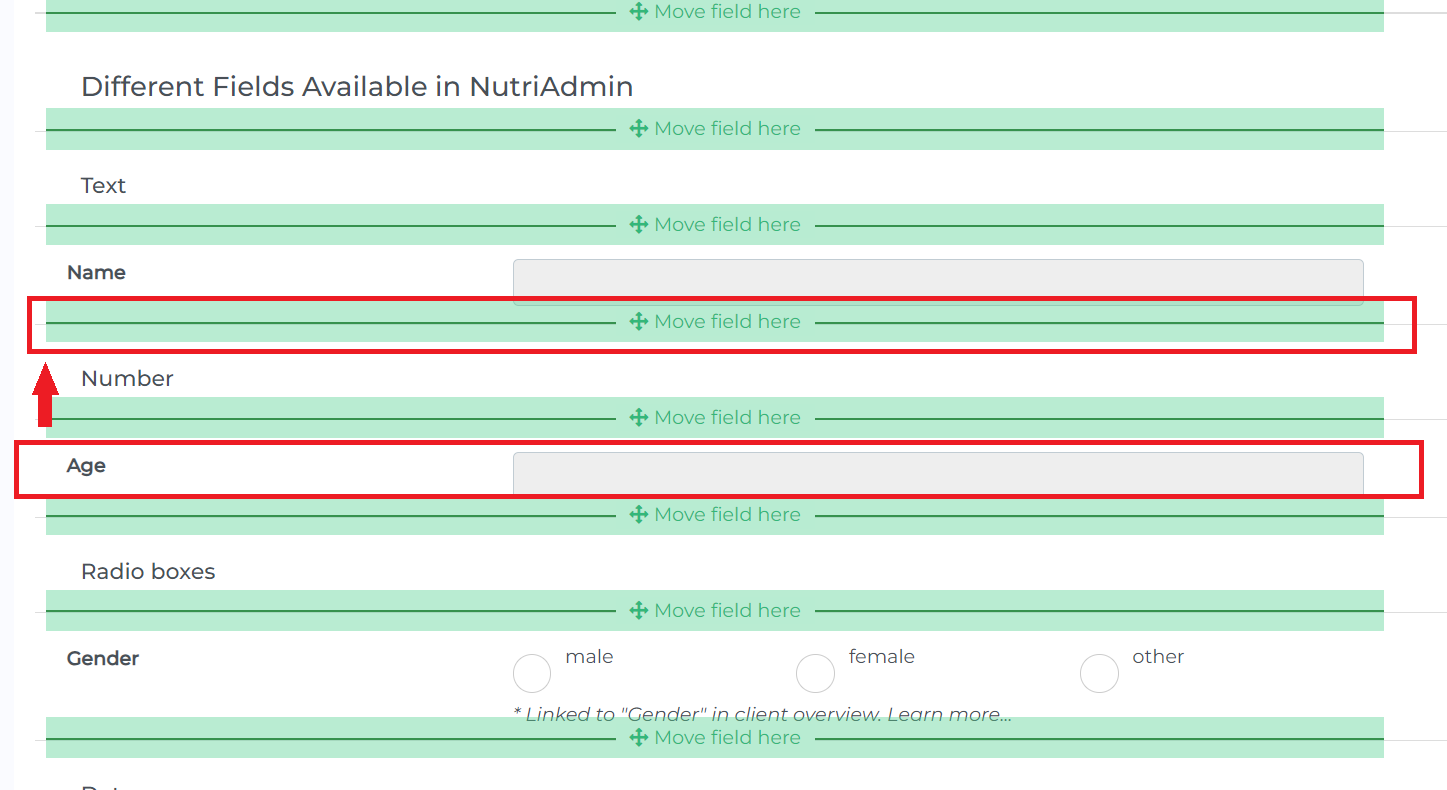
A confirmation message will appear and your selected field will be moved accordingly.
How to delete a field
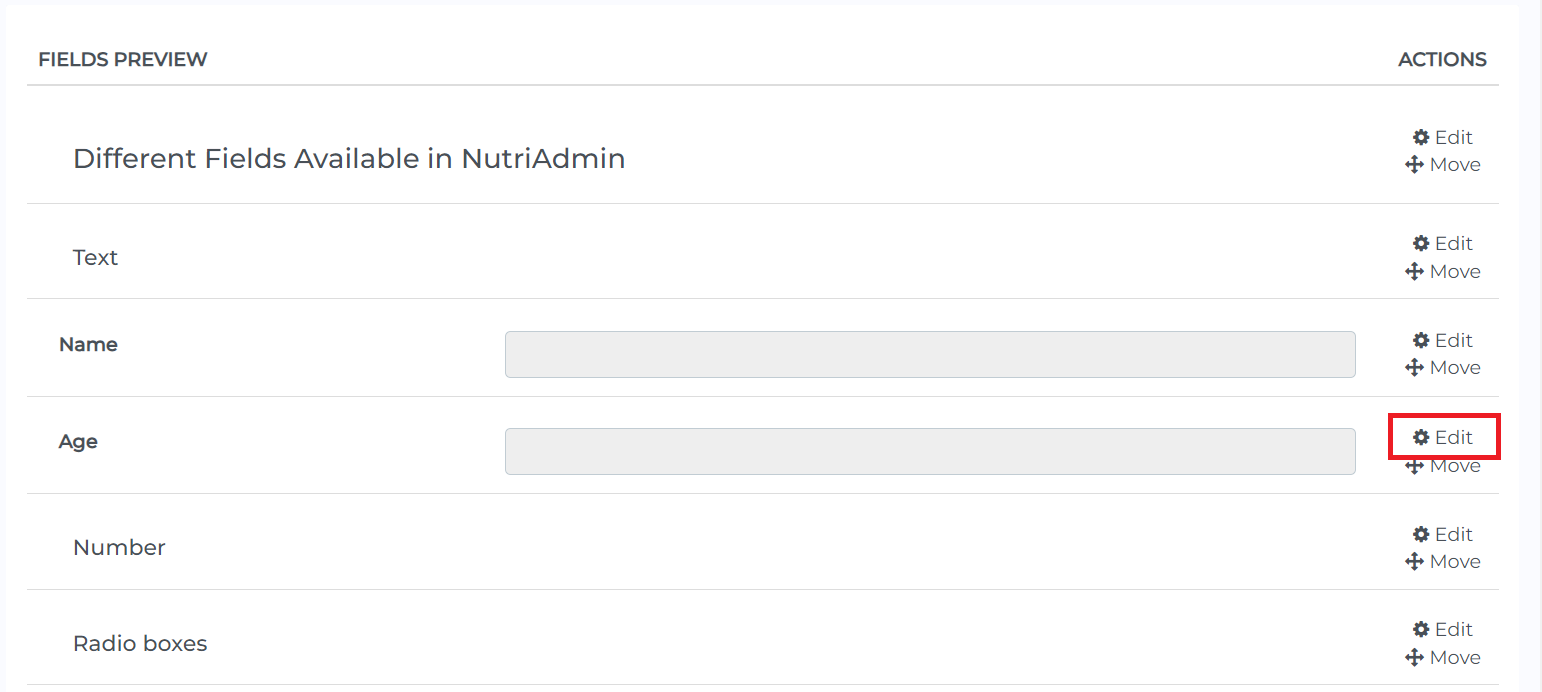
Click on the Edit button on the right side of the field you want to delete.
Click the Delete Field button on the lower left.
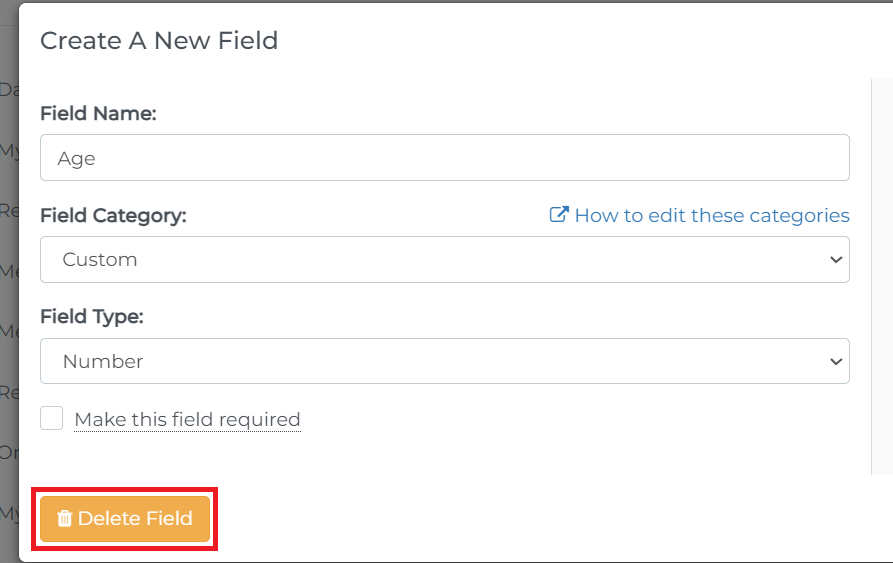
Click on Confirm Delete. This extra step is added to make sure you don't accidentally delete a field.

To learn how to customize your private notes, you can follow this tutorial.
We also offer a service where we can implement your own questionnaires for a small fee. You would send us the forms via email and we would implement them in your account within a few days. You can click here to learn more.