This tutorial will teach you how to import multiple clients at once from a CSV file. It will also show you how to type client data without the need of a file to create multiple clients in bulk.
You can watch this 3-minute video, or follow the steps detailed below
Watch video tutorial on YouTube
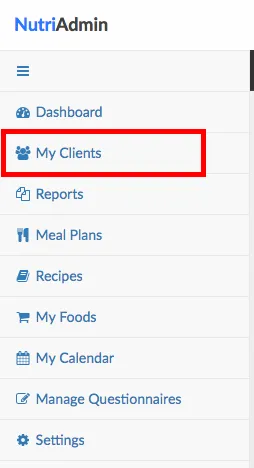
Step 1: Click on My Clients on the left-side menu.
Step 2: Click on New Client on the top-right corner of the screen.

Step 3: Click on the Import clients in bulk tab.

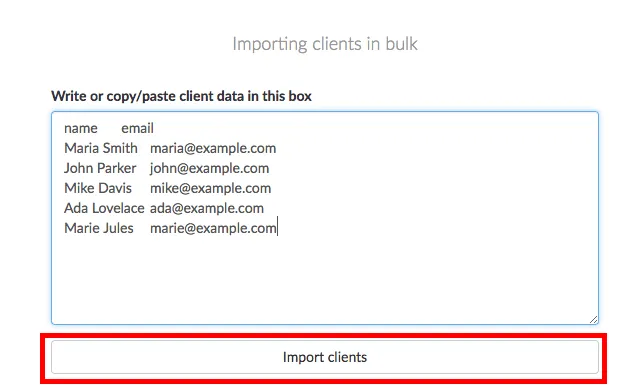
You will be presented with a large text box where you can enter the data for your new client records.
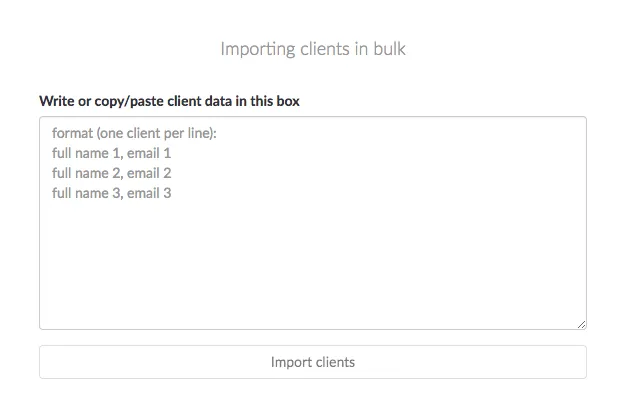
Important: You need to enter client data in the appropriate format. At the moment of writing this tutorial, NutriAdmin will accept 2 columns of data: the first one shall be a client's name, and the second, a client's email address.
Data should be in CSV (comma separated values) format. This is a common format for data importing/exporting. You can generate this kind of data from multiple software systems, including Excel (and other spreadsheet software) as well as Mailchimp, CRM systems, and client database software.
Technical note: Both commas and tab characters can be used as field separators. There is no need to include quote characters surrounding strings of text.
Step 4: Copy your clients' data from a .csv file. In this example, we will use an excel spreadsheet containing the names/emails of 5 clients.
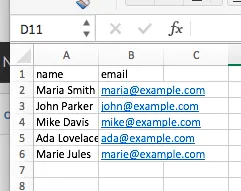
Just select 2 columns (one with the full name of your client, the other with the email). If you have extra data, you can ignore it for the purposes of this tutorial.
If your client names are split into first name and last name, you will have to create a column that concatenates both values. In Excel, this can be done with the concatenate function. For example, if the first and last names are in columns A and B respectively, the formula to concatenate them will be something like:
=CONCATENATE(A1, " ", B2)
Once you have selected the two columns, paste the data into NutriAdmin.
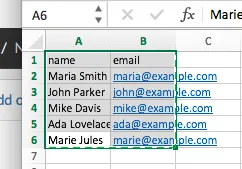
Step 5: After pasting the data from Excel (or similar), click on the Import clients button.
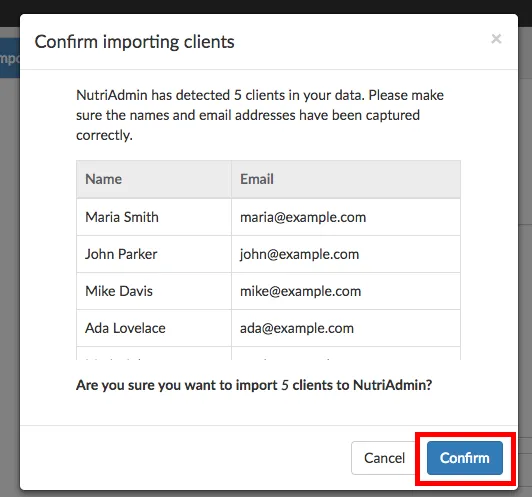
If the data is in the right format, you will get a confirmation window like the one below. Check your clients' data has been processed correctly, then click on Confirm.
If your data is in the wrong format, you will get an error message. If that's the case, please ensure you are only copy/pasting 2 columns (the first one with the clients' full name, and the second with the email). If the problem persists, please contact support and we will assist you.
If all goes well you should get a green confirmation notification like the one shown below.

You can now go back to My Clients, where you will find the new client records for the different customers you have just imported.