It is still relatively simple to export your client records so that you can use them in software like Mailchimp or other marketing platforms. One way to do this is to download all your data in bulk as explained in this tutorial. This should produce a csv file with your client data (as well as other files).
An alternative which may be easier in some cases is to simply copy paste client name and email addresses from your client list. This tutorial will show you how to export your clients step-by-step.
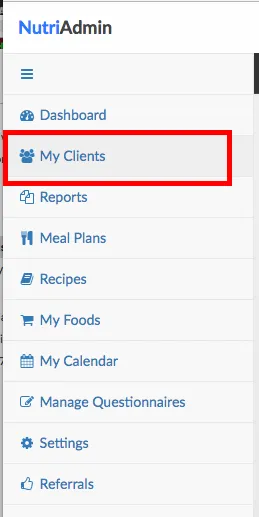
Step 1: Click on My Clients on the side menu
Step 2: Select all of your clients in the table with your mouse as illustrated below. Start by clicking on the top-left corner (just outside the borders of the table) and finish your selection on the bottom-right corner of the table.
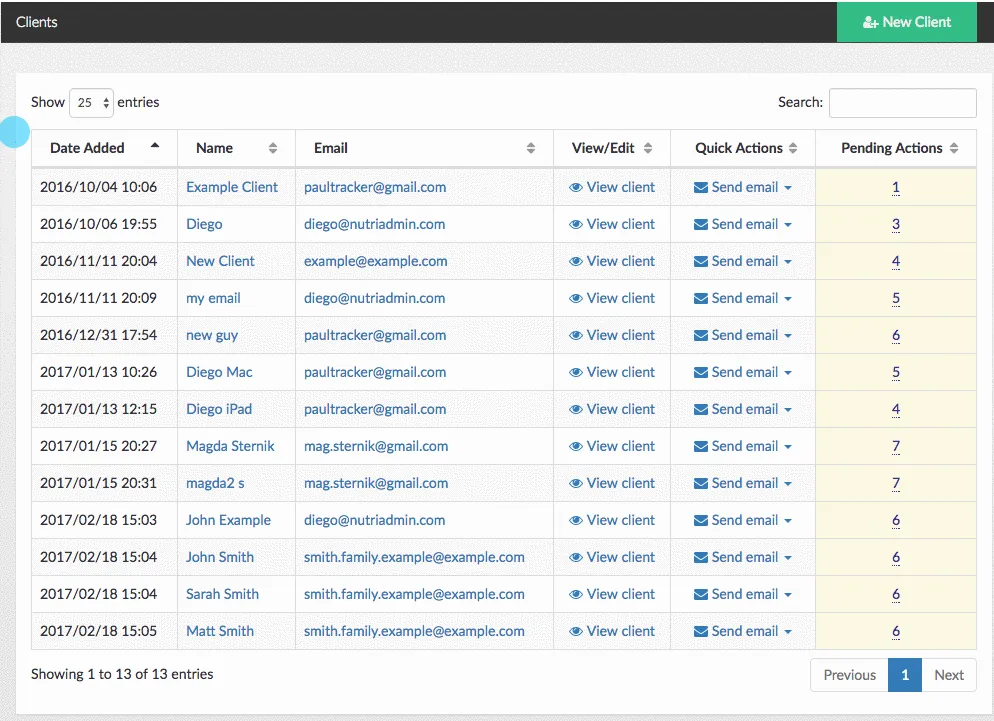
You may have to try a couple of times. The end result should be all of the text in the table highlighted.
If you have more than 25 client records, you can click on the dropdown that controls the number of entries in the table. This dropdown is placed on the top-left corner of the screen. You can choose up to 100 clients per page.

If you have more than 100 clients, you will have to repeat the process outlined in this tutorial a couple of times to copy all of your clients. Alternatively, you can download all your client data in bulk. As part of this download, there will be a csv file with a list of all your client names and email data.
Step 3: Open your Mailchimp account and click on Lists on the top of the screen

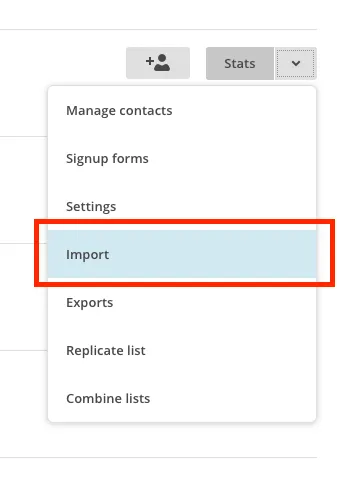
Step 4: Find the list you wish to import contacts to. Then, click on the dropdown button on the far right side, next to Stats.

Step 5: Select Import from the dropdown options.
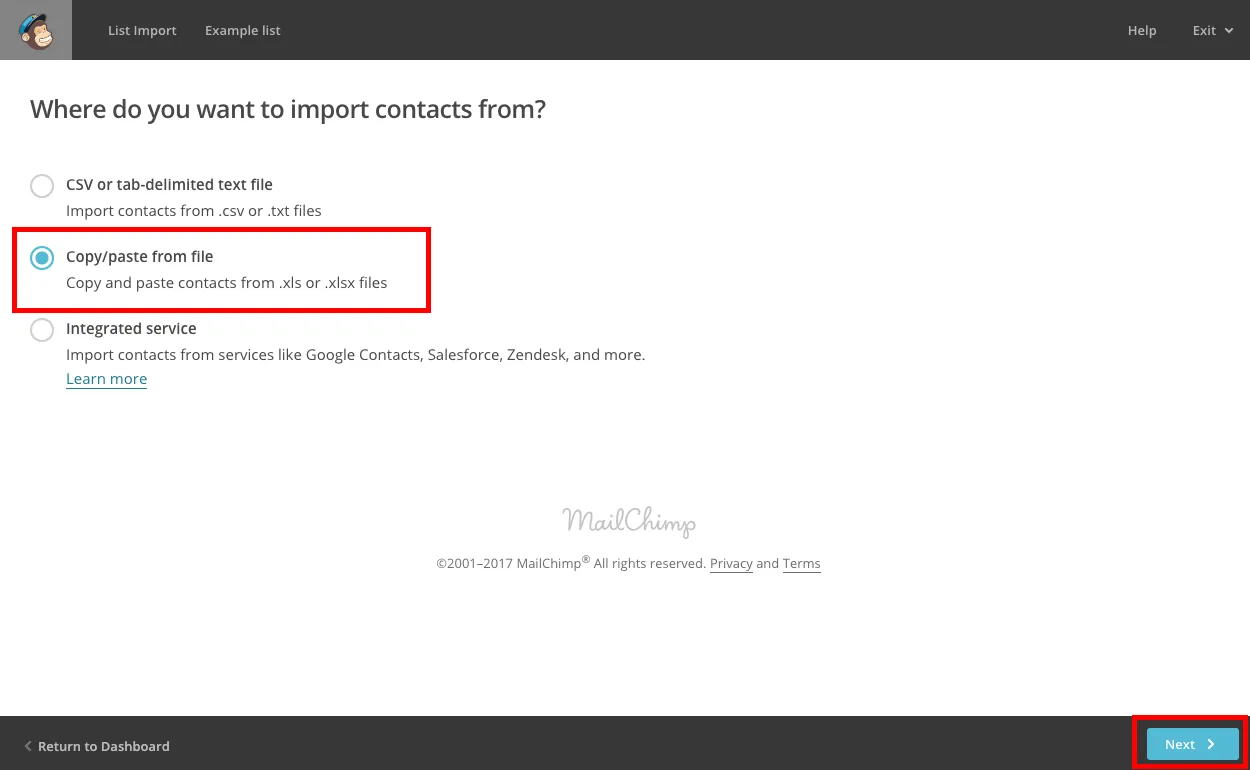
Step 6: Select Copy/paste from file, then click on Next on the bottom-right of the screen. Do not worry about the file formats mentioned (i.e. .xlsx) the table information you copied from NutriAdmin is in the valid format.
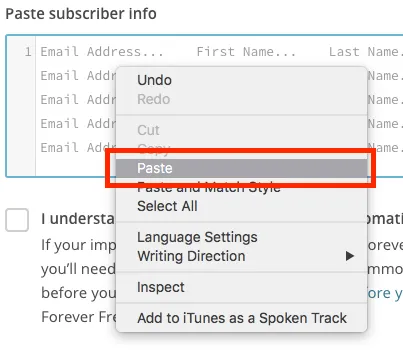
Step 7: Right click on the empty area, then select Paste from the context menu.
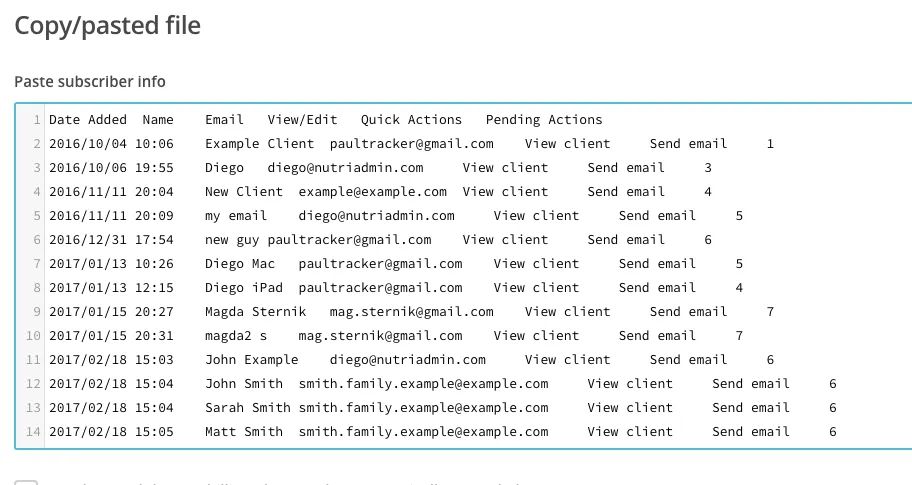
If you followed the steps correctly, you should see your NutriAdmin clients pasted like in the example below. Do not worry if the columns are mis-aligned, Mailchimp will be able to sort the data appropriately.
Step 8: Tick the acknowledgement checkbox, then click on Next to proceed.

Step 9: You will now be able to decide which column in the data represents each data field. Most likely, you will want to keep the first three columns (date, name, email respectively) and skip the rest.
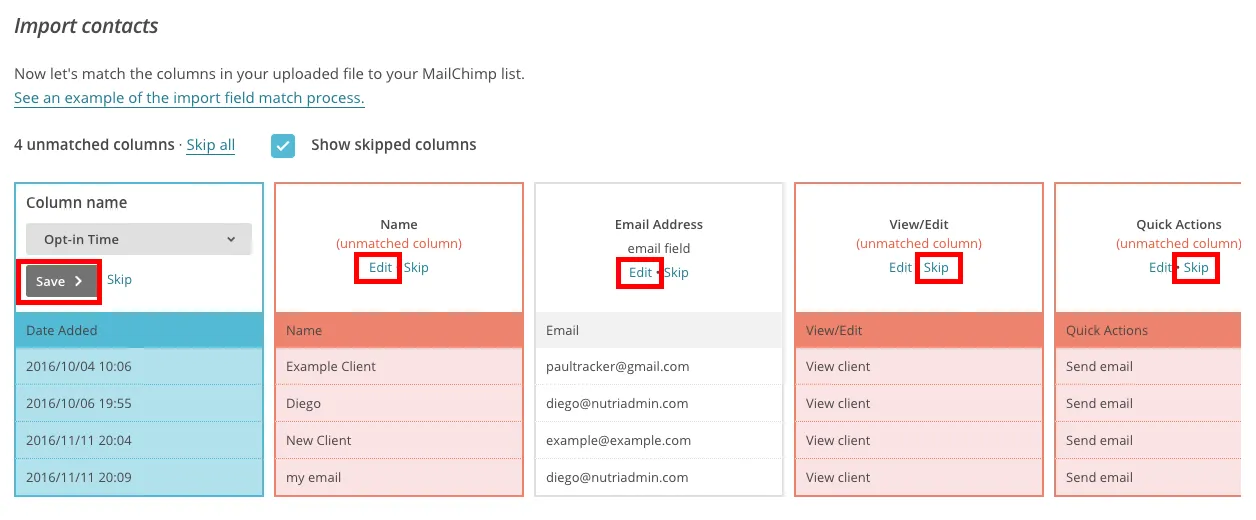
By clicking the edit, save, and skip buttons, you will be able to match each column to the relevant data field in your list. The end result should look like the example screenshot below.

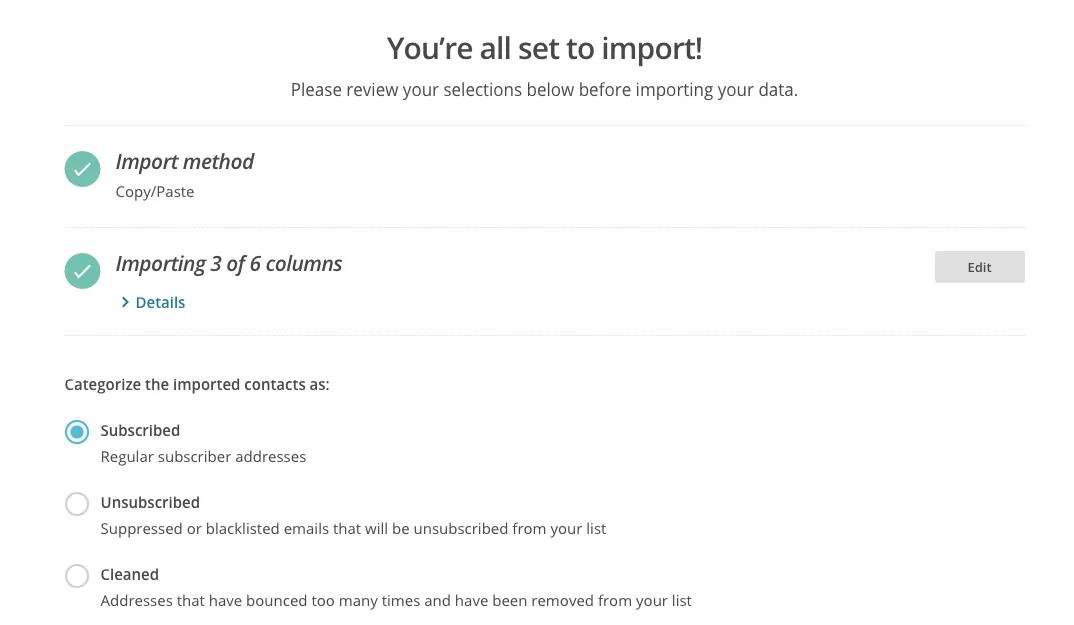
Step 10: After clicking Next, you will arrive at the final step of the importing process in Mailchimp. Review that all the details are correct, and click on Import to finish the process.
You can repeat the steps in this tutorial as many times as needed. Mailchimp has an option to remove duplicates from the list, so you do not need to keep track of who has been added to the list already and who has not.
A convenient process – if you want to import your contacts from NutriAdmin on a regular basis – may be to do it once a month on an specific date (e.g. the 10th of each month). Then, you can sort your contacts by date added in NutriAdmin, and only copy last month's clients to your Mailchimp lists.