When you are reviewing/editing a client record, the first thing you will notice is the overview tab. This tab is there to provide you with a quick summary of some of the most relevant data about a client (click here to learn more about the different tabs in client records).
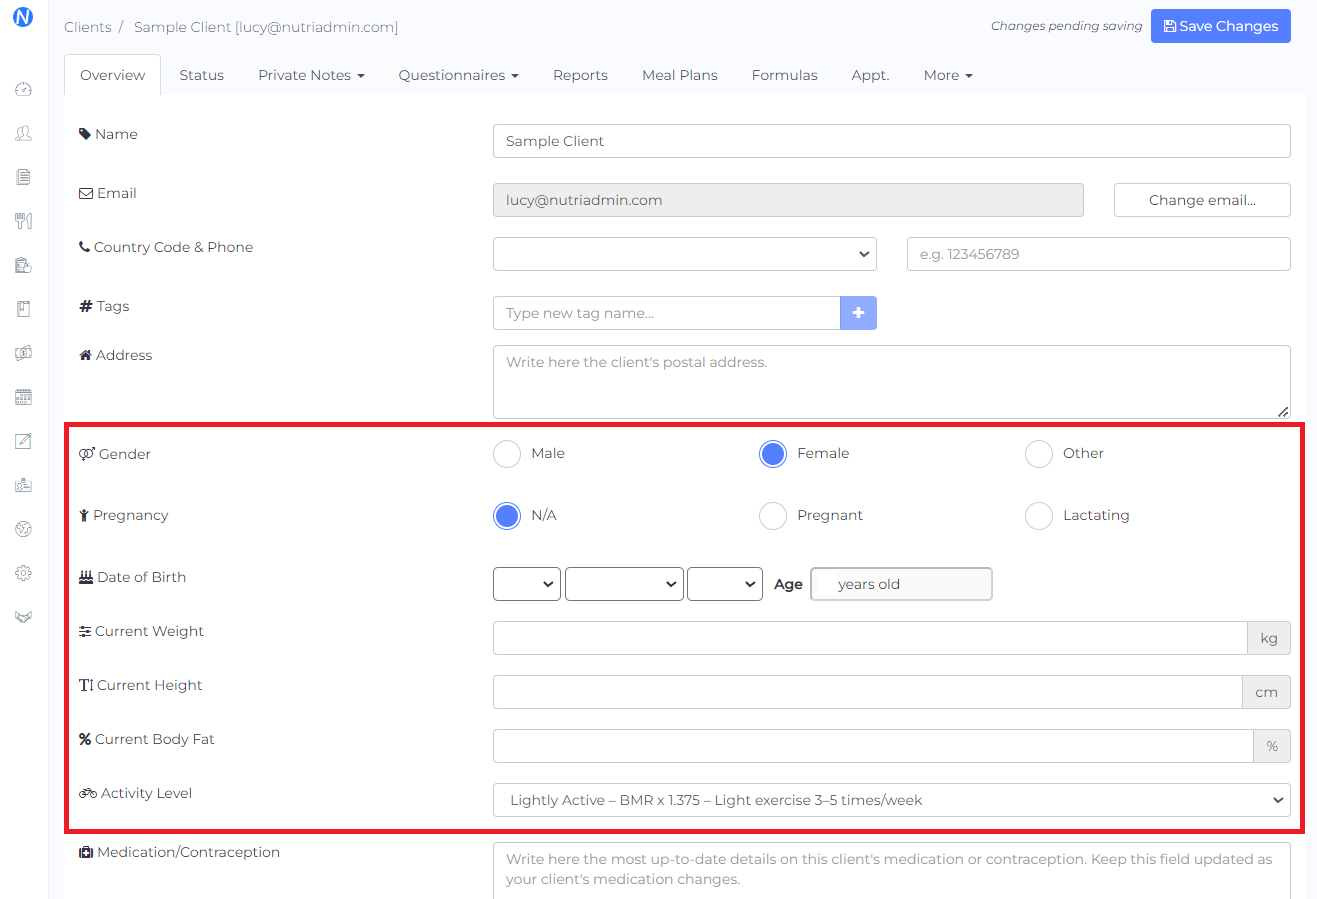
When a client fills in a questionnaire, there are a few special fields that are linked to their corresponding counterpart in the overview tab. These are:
- Date of birth
- Gender
- Pregnancy/Lactation
- Current Weight (in Kg or Lb)
- Current Height (in Cm, Ft, or Ft and In)
- Current Body Fat
- Activity Level
Note: The email and client name fields cannot be modified by the client automatically via a questionnaire – you have to enter these two fields manually when creating a new client record.
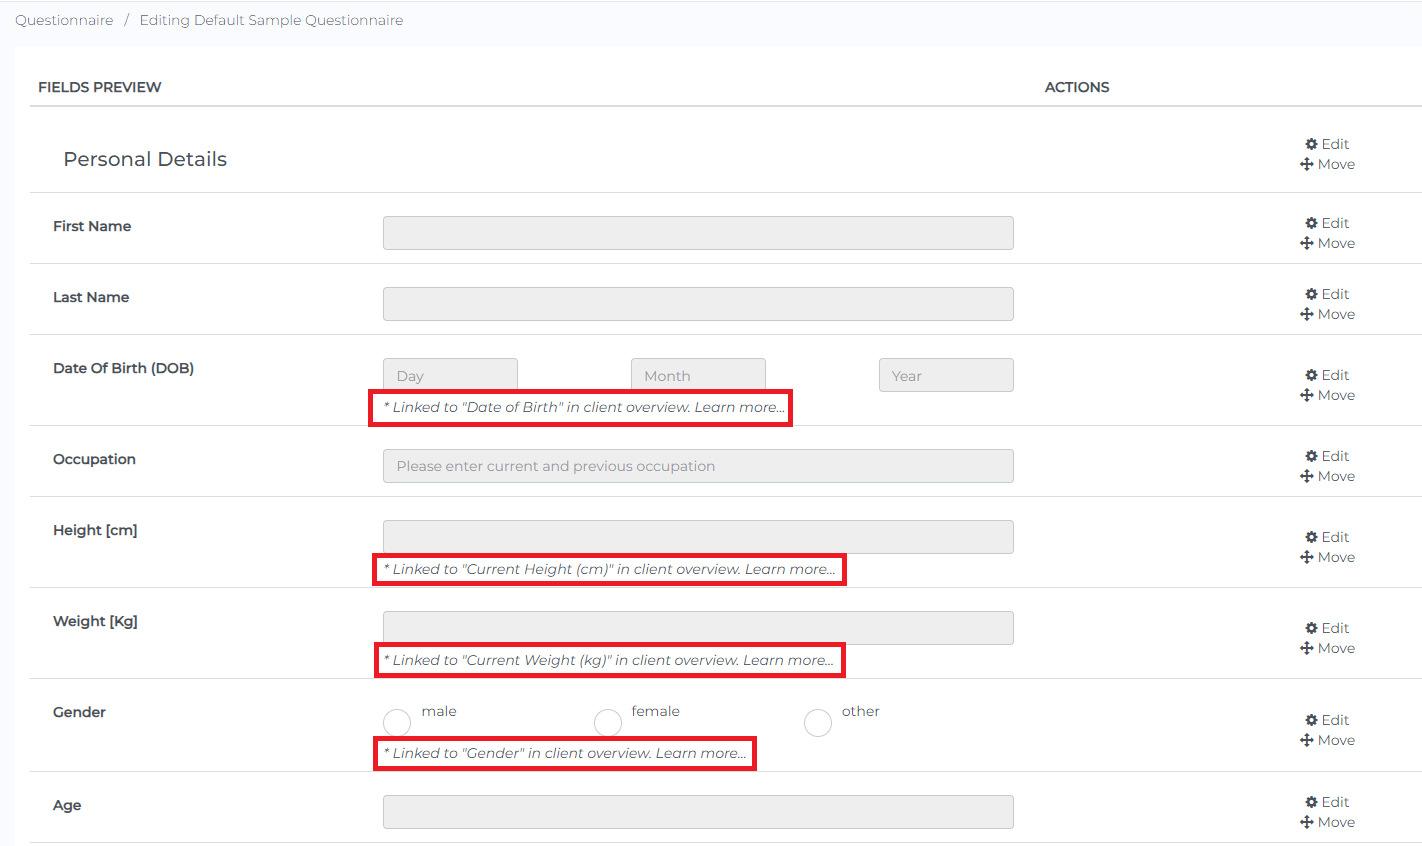
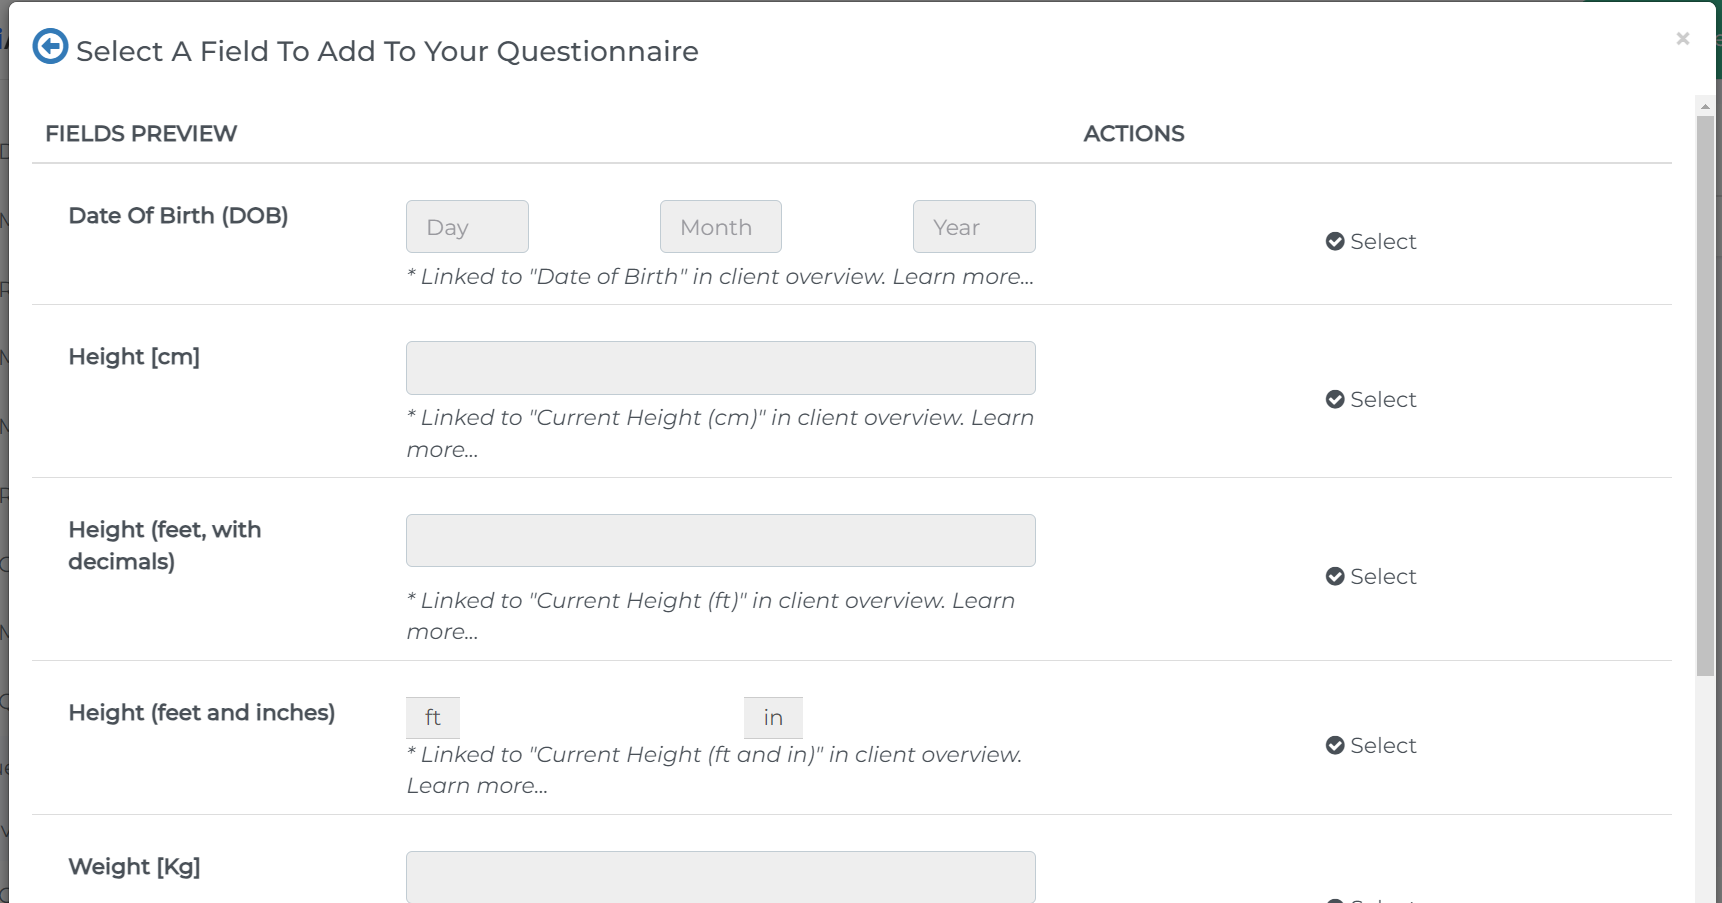
You can identify these linked fields when editing a questionnaire by finding comments like the ones highlighted in the screen-shot below.
Note: If you create your own fields to replace the default fields for DOB, gender, etc, the custom fields will not be linked to the overview tab.
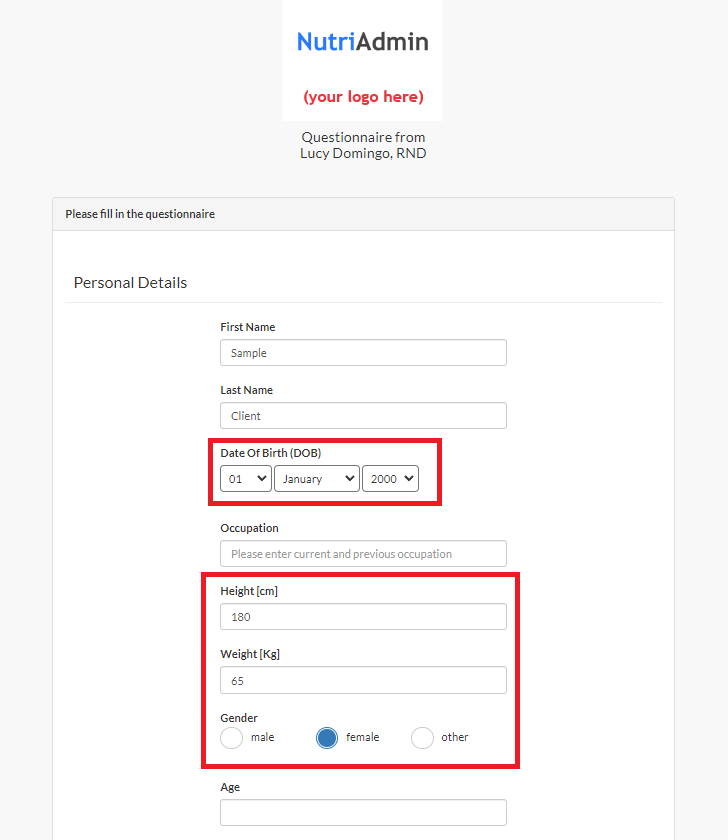
When you send a questionnaire to a client, she will have the chance to fill in her date of birth, height, etc.
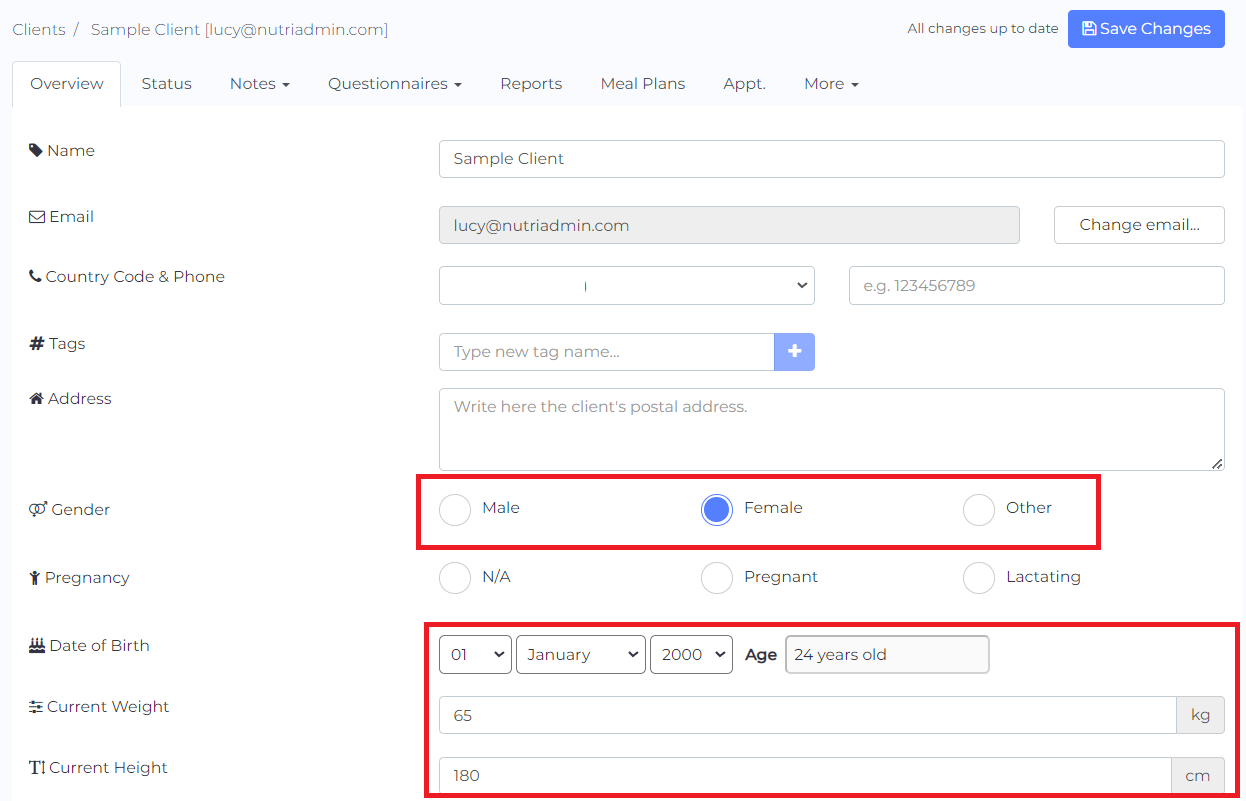
Then, if you open up the client's record, the overview tab will be populated automatically using available data fields from the questionnaire.
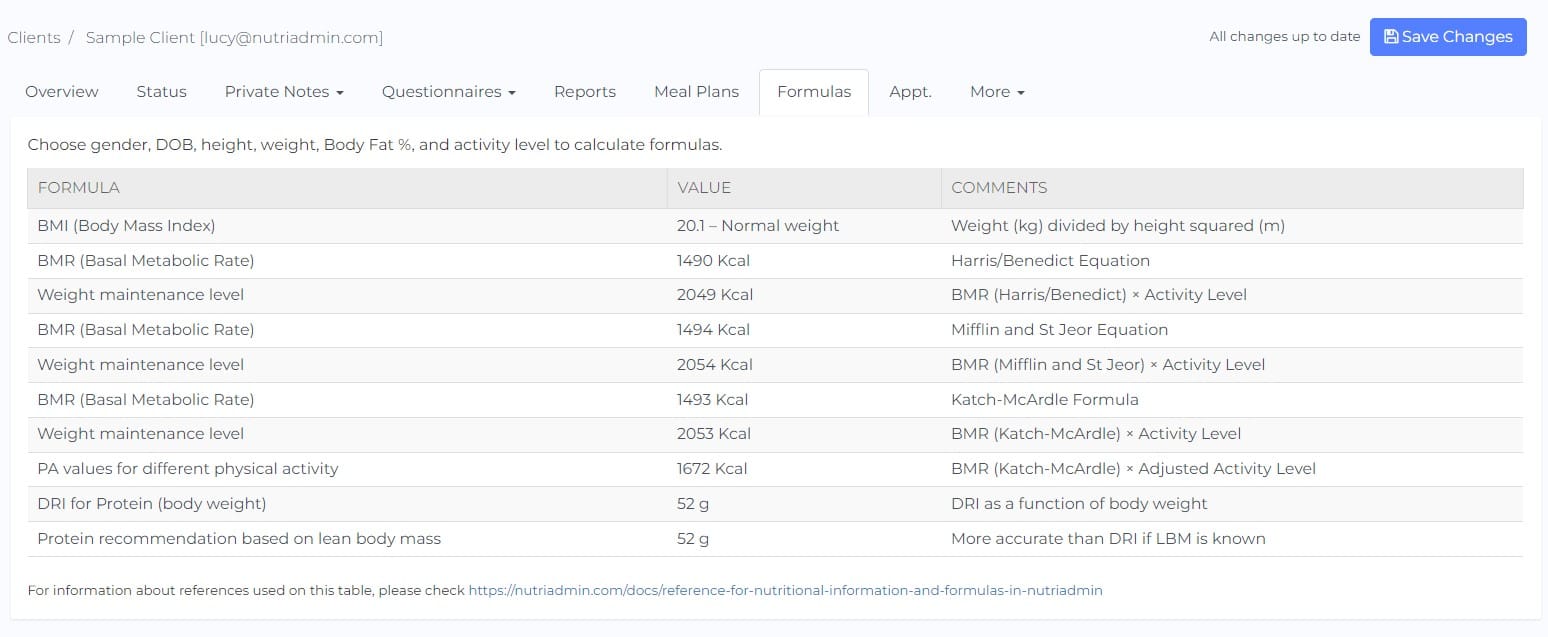
There are several advantages of using the overview tab. For instance, some of the most basic information about your clients can be found there. Moreover, data from the overview tab is used to compute different formulas such as:
- BMI
- Harris-Benedict Equation
- Katch-Mcardle calculation
- Mifflin-St Jeor equation
- Schofield equation
- TDEE calculations
Using the linked fields can save you time by streamlining some of the data entry you would have to do manually otherwise.
NOTE: When a client fills in a questionnaire, any data entered in linked fields will overwrite the existing corresponding fields in the overview tab.
For example, if you send a questionnaire to a client today, and writes that his weight is 80 Kg, this value will be recorded on the overview tab today. However, if you send another questionnaire to the same client in 3 months time, and now his weight has changed to 77 Kg, this new value will overwrite the previous one in the overview tab.
Most of the time, the overwriting behavior is desirable. However, you will have to design your questionnaire slightly differently if you do not want the overwriting to occur (by creating custom fields, for example, which are not linked to the overview tab).
How to add linked fields to your questionnaire
Since January 2018, if you sign up for an account at NutriAdmin you will get a "Questionnaire linked to overview fields" as one of the default questionnaires in your account. This questionnaire is designed so that you can copy its fields to other custom questionnaires to have them linked to the overview tab. If you do not have this questionnaire, please drop us an email at team@nutriadmin.com and we will set this questionnaire for you.
Here is a short tutorial on how to use this special questionnaire to extract the fields to a new questionnaire.
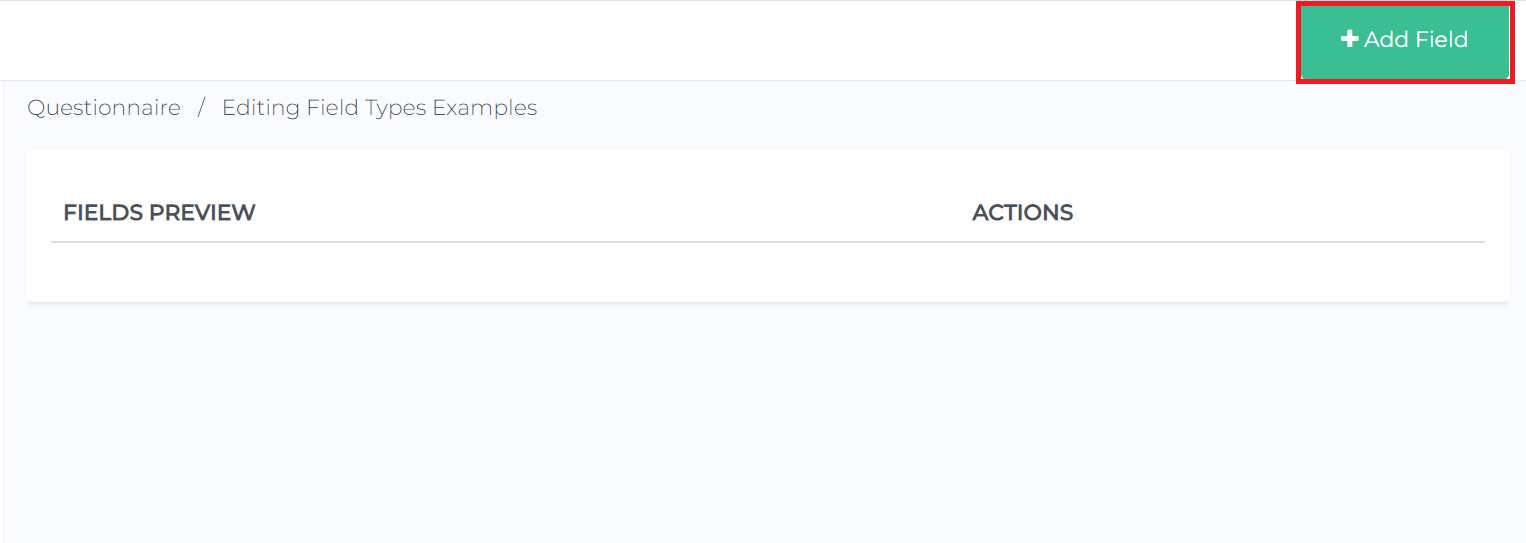
Step 1: Open the questionnaire you want to edit and click Add Field.
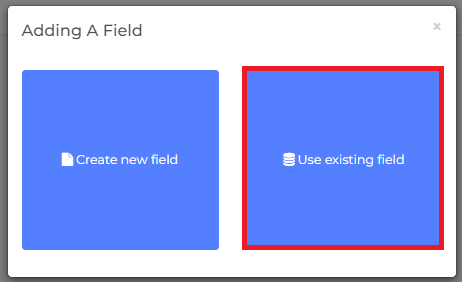
Step 2: Click Use existing field.
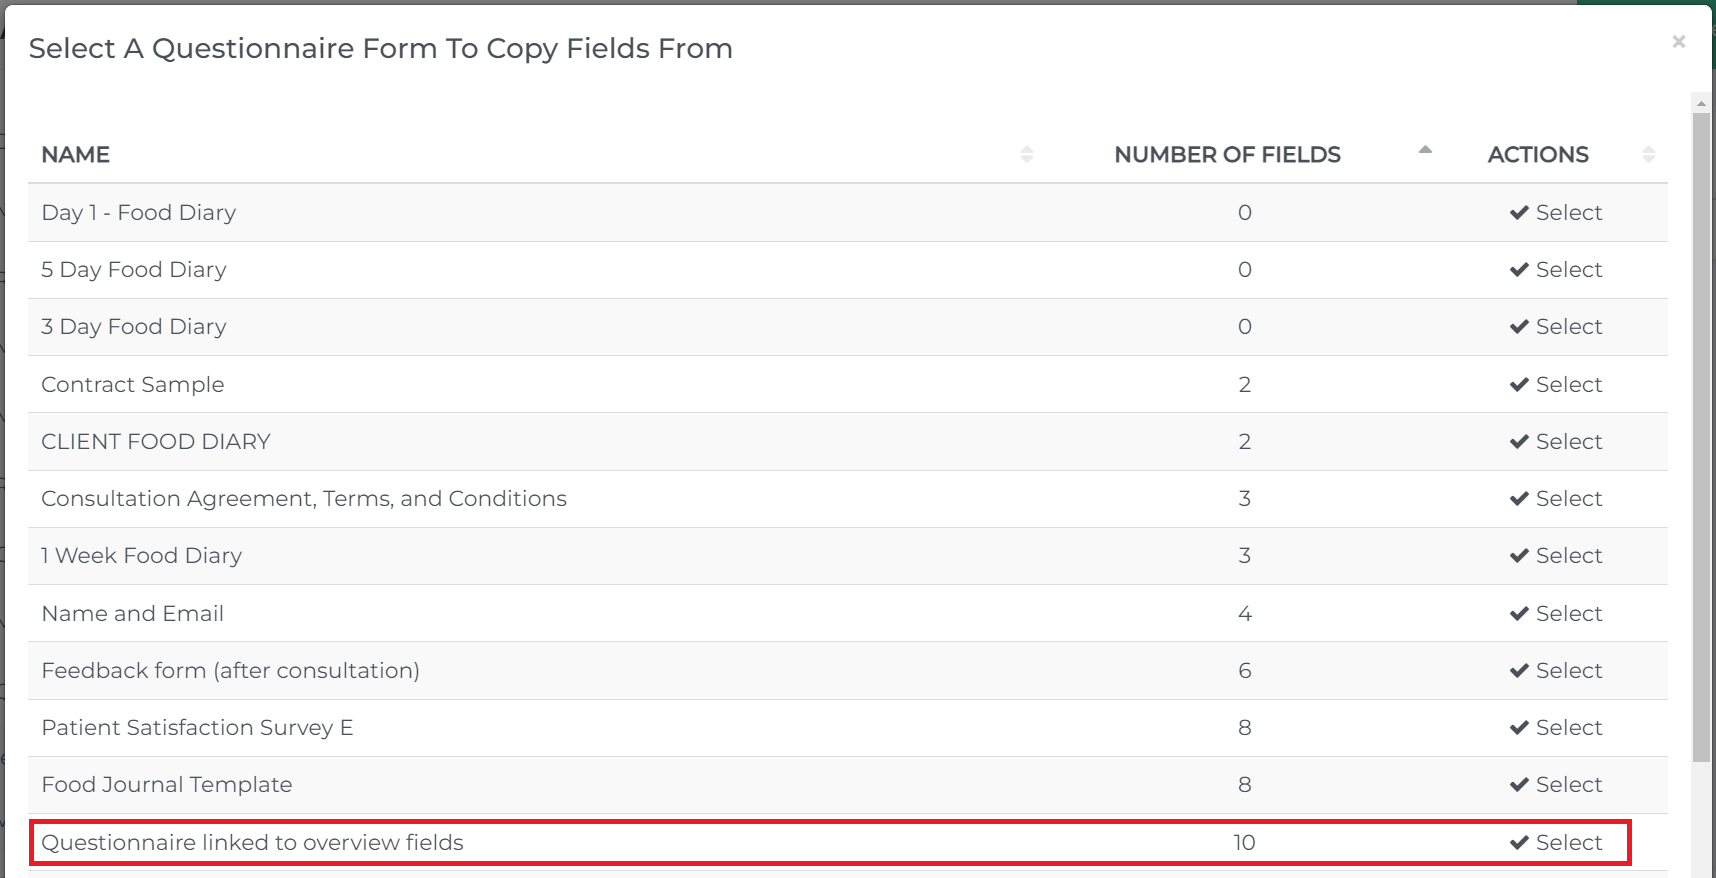
Step 3: Select the Questionnaire linked to overview fields.
Step 4: Select the field you want to add to your questionnaire. Notice that all the fields in this questionnaire are linked to the corresponding values in the client overview tab.
Step 5: Insert the field in the desired position in the questionnaire.

That's it. Your questionnaire now has a field linked to the desired client overview field.
You can repeat this process for other fields. These overview linked fields are special, and if you create them from scratch using the questionnaire editor the fields in the questionnaire will not be linked automatically. You need the fields to have the Linked to client overview text underneath for the automatic completion to work