One of the most noteworthy NutriAdmin features is its meal plan generator, a tool designed for nutritionists, dietitians and fitness professionals that will drastically reduce the time of creating a fully customized and personalized meal plan. In this article, we will explain how to create a complete meal plan in just three steps.
Whether you want to use your own meal program and recipes or prefer to rely on our database comprised of 70,000+ food items and 330,000+ recipes –or even a mix of both!- this system is for you.
Once you have clicked on the Meal Plan feature through NutriAdmin’s dashboard, selected your client and the number of days you want the meal plan for (from 1 to a week), you will be faced with two options: creating a meal plan from scratch or generating one following certain parameters. Both of them will give you maximum control over the process, full customization, and a professional-looking document for your clients and won’t take more than a few steps.
Creating a meal plan from scratch
.jpg)
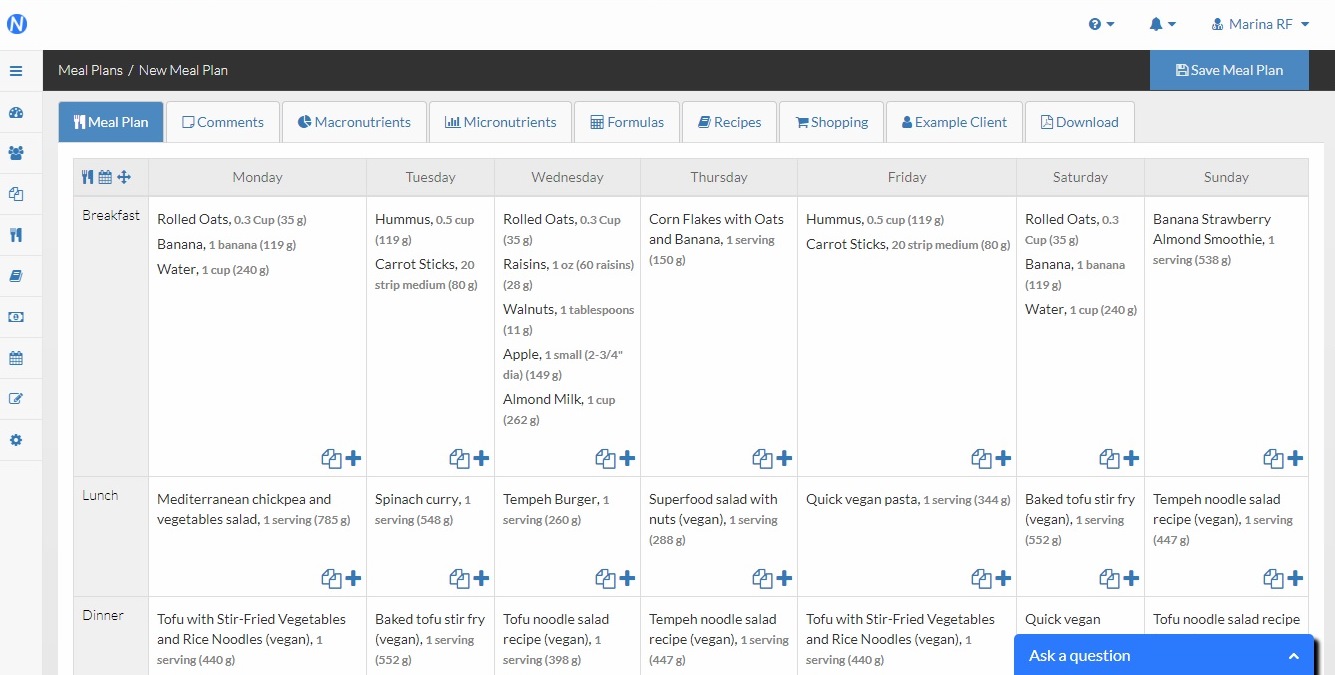
The first route you can go for is creating a meal plan from scratch, which will lead you to a table-like screen that spans throughout the many days you have selected, including a little menu on each cell that will allow you to add the desired items (recipes, food, presets, search in the database…). Here you can manually add each meal, food items and recipes or even search them in our database and combine them however you need.
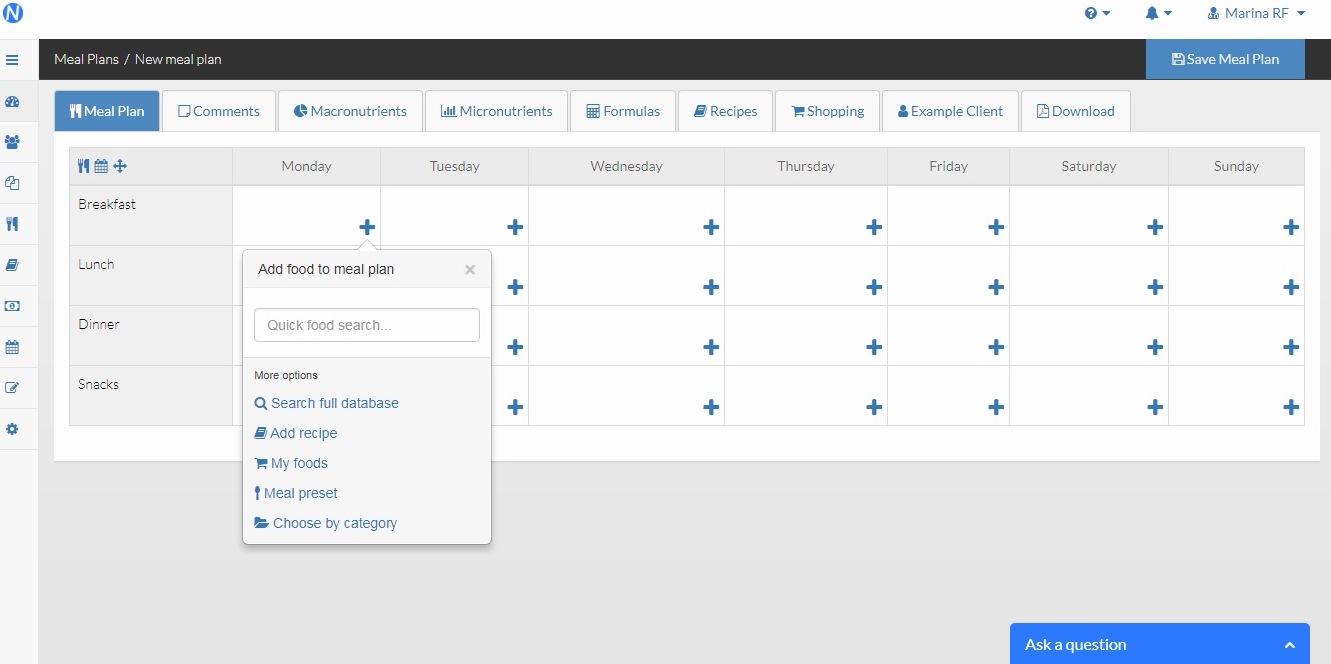
Once you have filled your plan with as many meals as you want, you’ll be able to see the different macro and micro parameters, add or edit your notes, formulas, recipes, and the shopping list that will be generated automatically according to the meals and food items you have entered navigating through the top menus. And, of course, you will have the option to save the plan and as many additional information as you want in PDF and into your client file.
Once you have saved the meal plan, it will be part of your own meal plan record, so you will be able to come back to it, edit it or use it again if you need it.
Auto-generate a meal plan
.jpg)
On the contrary, if you prefer the software to generate a meal plan for you according to the specific parameters your client may need, here’s the second option for you that won’t require you to enter each meal from scratch. Once you click this option, the software will display a list of different diets for you to choose from, and their correspondent categories, carbs, fat and protein levels.
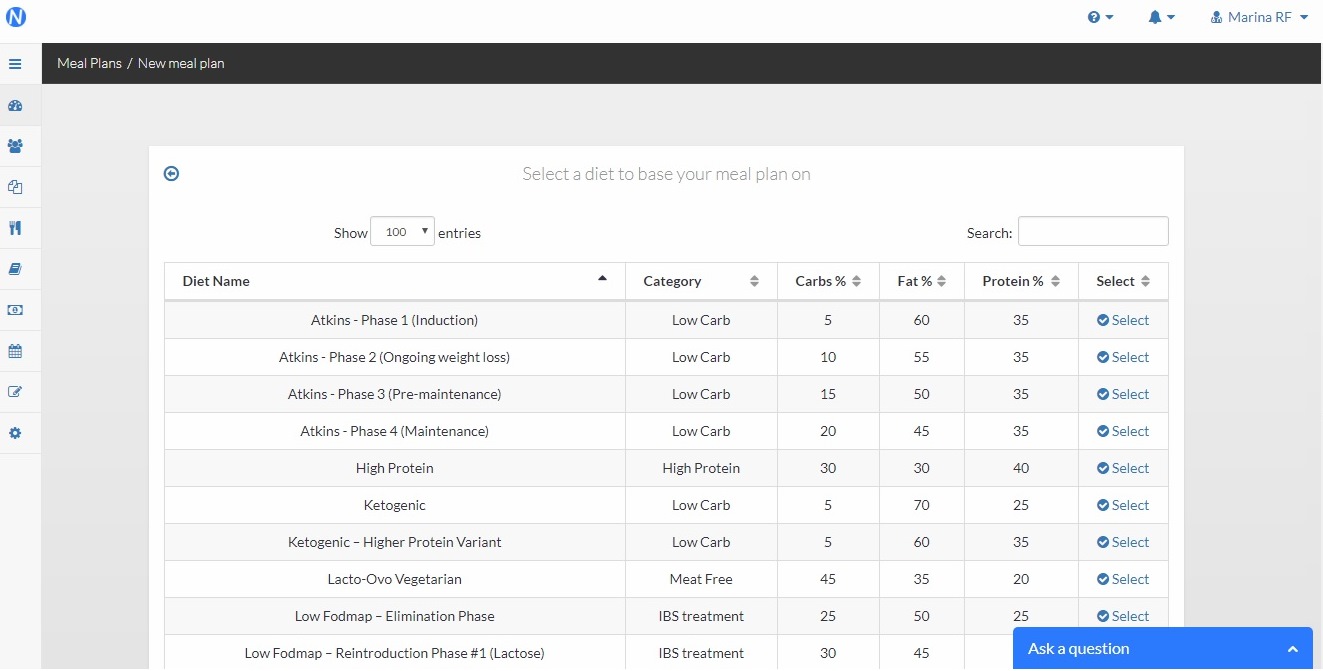
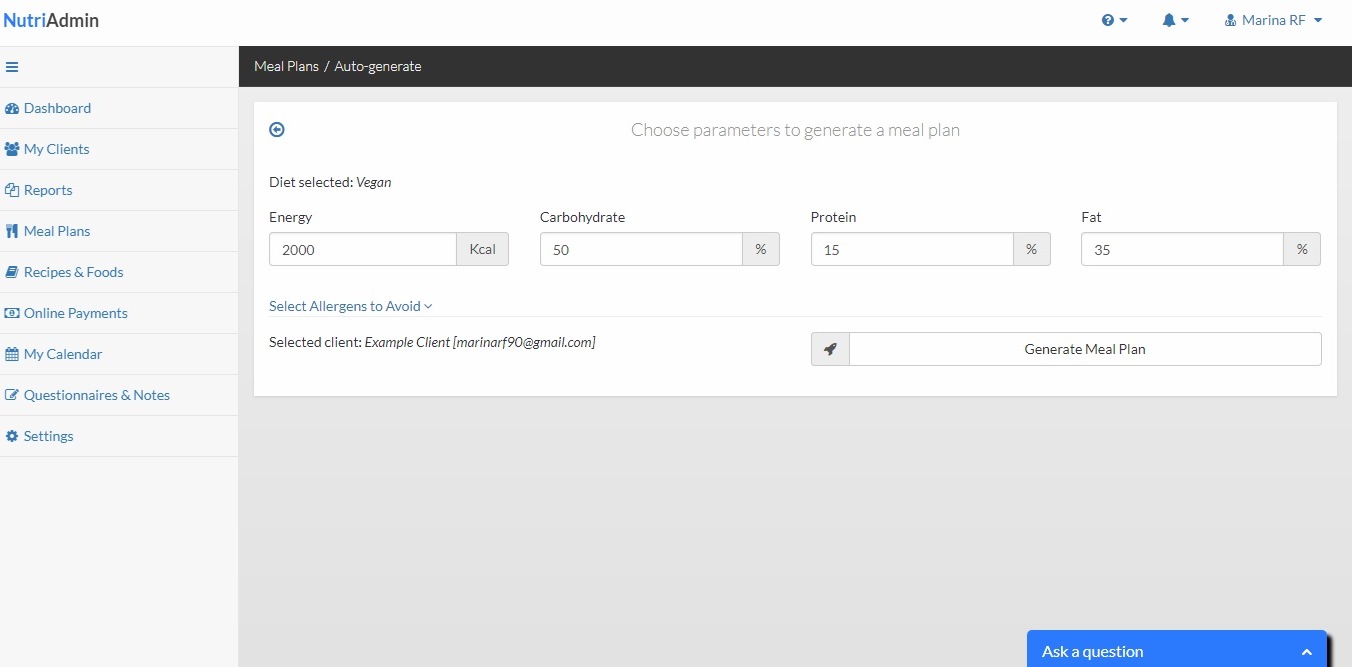
Once you select the diet (in this example, we have selected a vegan diet), you’ll be able to choose the parameters to generate the meal plan, such as Energy (kcal), Carbohydrates, Protein and Fat, as well as a selection of foods or allergens to avoid throughout the menu.
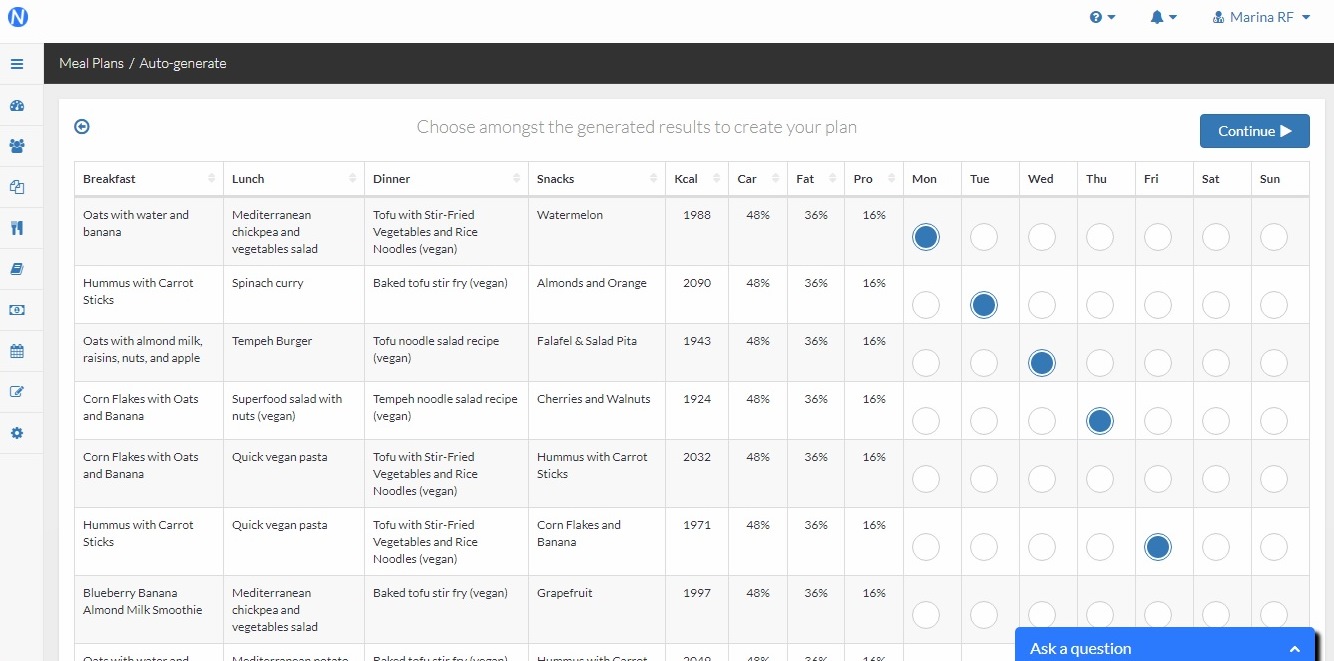
After clicking on “Generate Meal Plan”, in no more than a few seconds you’ll face again the table-like screen with auto-generated menu options for you to choose from and create a unique, personalized and custom meal plan for as many days as you selected earlier.
Clicking “continue” again and there you have your meal plan divided into breakfast, lunch, dinner and snacks.
In the same way as the first option, this second route will also generate macro and micronutrient displays, formulas, recipes and an automatic shopping list for your client.
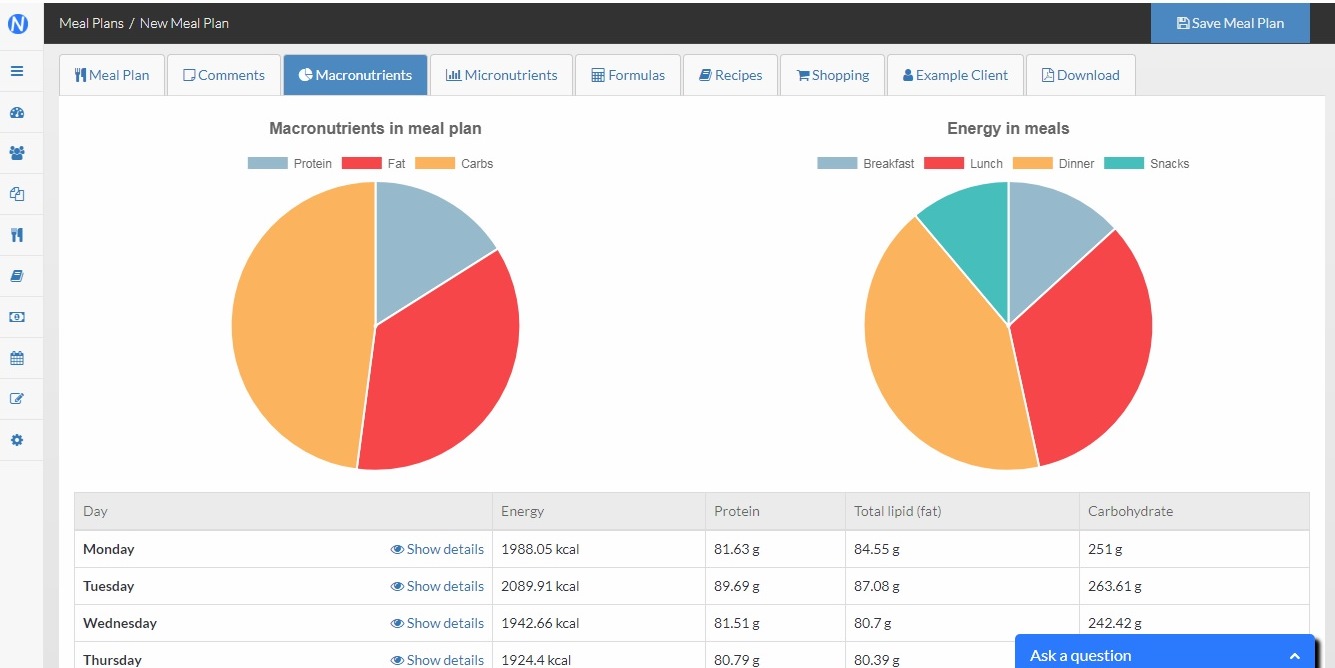
In summary, just three steps -select a method, introduce parameters and/or food items and obtain a customizable meal plan, besides additional info, for you and your client to work with. The software will automatically generate for you the shopping list, the macro and micronutrient analysis and other useful information, besides recipes for each meal, drastically cutting down the time you traditionally spend on this task.
Don’t forget to visit our Meal Plan feature page to read everything about meal planning with NutriAdmin.
If you need tips and insights on finding the best meal planning app for your practice, you can check out our comprehensive guide.

